Mera Peak is the highest of Nepal’s officially designated trekking peaks, rising to 6,476 meters above the remote Hinku Valley southeast of the main Everest Base Camp trail. For trekkers who have already completed the classic EBC route, or who want a genuine, non-technical Himalayan summit as their first taste of climbing above 6,000 meters, Mera Peak occupies a unique place: it demands no prior technical climbing experience, yet it delivers one of the most spectacular summit panoramas in the entire Himalaya, a view that takes in five of the world’s fourteen 8,000-meter peaks in a single sweep.
This guide covers everything a prospective climber needs to know about Mera Peak: where it is, how difficult it genuinely is, what permits and costs are involved, how the standard itinerary unfolds, and how it compares to the other popular Everest-region trekking peaks like Island Peak and Lobuche East. We have drawn on established mountaineering references and the accumulated experience of guiding trekkers through the Khumbu and Hinku regions to put together an honest, detailed picture of what climbing Mera Peak actually involves.
Where Mera Peak Is and Why It Is Different From the Standard EBC Route
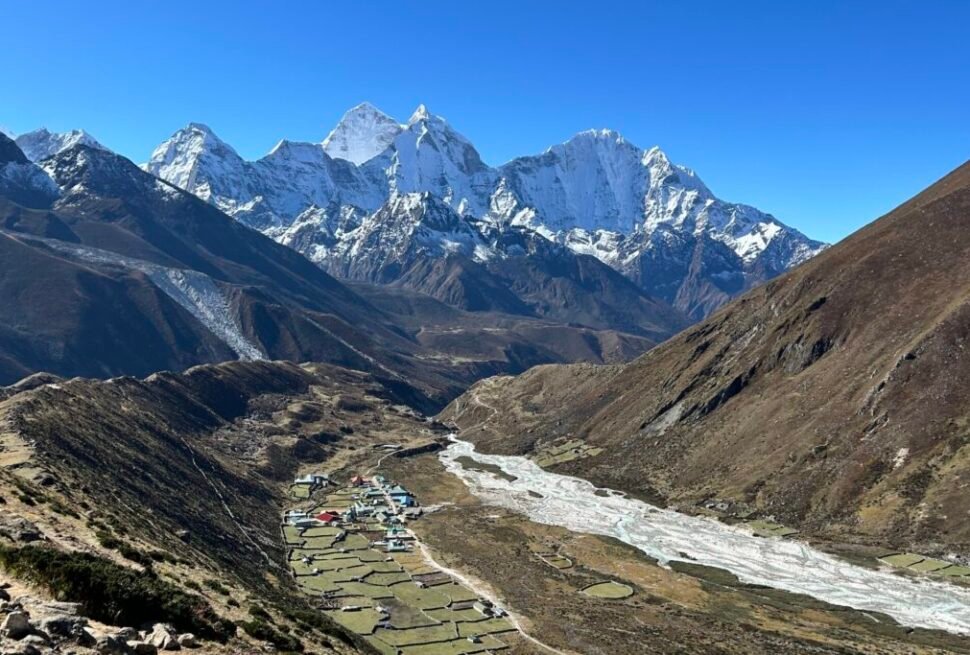
Mera Peak sits in the Hinku Valley, a quieter, less-trafficked valley to the south of the main Khumbu region, within the Mahalangur Himalaya, the same broader mountain range that contains Everest itself. Unlike the Everest Base Camp trek, which follows the well-developed Dudh Koshi valley north from Lukla through Namche Bazaar, a Mera Peak expedition typically approaches from Lukla via a quieter eastern route through Paiya, Panggom and the Hinku Valley, crossing the Zatrwa La pass early in the trek before the terrain opens into the wide, glacially carved valley beneath Mera itself.
This means a Mera Peak climb offers a genuinely different flavor of Himalayan travel than the standard EBC trek: fewer trekkers on the trail, more basic accommodation in smaller settlements, and a stronger sense of remoteness, even though the peak itself sits only a modest distance from the busier Khumbu trails as the crow flies. Many climbers combine a Mera Peak ascent with a crossing into the Khumbu via the Amphu Labtsa pass or a descent toward Lukla through the Hinku Valley, extending the trip into a genuine expedition-style circuit through two distinct valleys.
Mera North, Mera Central and Mera South: Understanding the Summits
Mera Peak is not a single summit but a massif with three named high points. Mera North, at 6,476 meters, is the highest and the summit almost all commercial expeditions and trekking groups aim for. Mera Central sits close behind at a similar elevation and was the point first reached by the 1953 expedition. Mera South is the lowest of the three and rarely climbed commercially.
When trekking companies and permit documents refer to “Mera Peak,” they are almost always referring to Mera North, reached via the standard northern glacier route from Khare and the Mera La. This is the peak most climbers picture when researching a Mera Peak expedition, and it is the summit this guide focuses on throughout.
A Brief History: First Ascent and Why Mera Became Popular
Mera Peak’s first recorded ascent came on May 20, 1953, just days before Everest itself was first summited, when Colonel J.O.M. Roberts and Sen Tenzing reached the top of Mera Central. Roberts, a British Army officer who spent much of his career in Nepal, is often credited as the founding figure of Nepal’s commercial trekking industry, and his early exploration of the Hinku Valley helped put Mera on the map as an accessible high-altitude objective for climbers without full mountaineering backgrounds.
Mera North itself, the summit most climbers reach today, was first climbed later, and the peak was formally opened to foreign trekking permits by Nepal’s Ministry of Tourism in the years that followed, eventually becoming classified as a Group A trekking peak, the designation that allows it to be climbed under a simplified permit system rather than the full expedition mountaineering permit required for peaks like Ama Dablam or the 8,000-meter giants.
How Difficult Is Mera Peak, Honestly
Mera Peak is routinely described as the most accessible 6,000-plus-meter summit in Nepal, and for good reason: the standard northern route involves no rock climbing and no exposed technical terrain, just a long, glaciated snow slope requiring crampons, an ice axe, and the use of fixed ropes near the summit ridge. There are no significant crevasse fields to navigate on the standard route in normal conditions, and the climbing itself is more accurately described as a very high-altitude trek on snow and ice than technical mountaineering.
That said, “accessible” does not mean easy. The overwhelming difficulty of Mera Peak comes from altitude, not technique: 6,476 meters is high enough that altitude sickness, extreme cold, and the sheer physical toll of a summit day above 6,000 meters are the real obstacles, not any specific climbing move. Summit day typically starts at 2am or 3am from High Camp at roughly 5,800 meters, involves six to eight hours of steady, sustained climbing in extreme cold and thin air, and demands a level of stamina and mental resilience well beyond what the standard Everest Base Camp trek requires.
We would characterize Mera Peak as a serious, physically demanding undertaking suitable for fit, well-prepared trekkers with no prior technical climbing experience, provided they commit to genuine cardiovascular training beforehand and, ideally, spend a day or two practicing basic use of crampons and an ice axe before the summit push, something most reputable operators build into the itinerary at Khare.
Mera Peak Permits and Fees
Mera Peak sits inside the Group A category of trekking peaks regulated by the Nepal Mountaineering Association (NMA), which means the climbing permit is separate from the standard Sagarmatha National Park entry permit and the local rural municipality fee you already pay for the Everest Base Camp corridor. The NMA climbing permit for a Group A peak like Mera Peak is priced seasonally: roughly USD 250 per person in the spring climbing season (March to May), about USD 125 in the autumn season (September to November), and around USD 70 in winter and summer/monsoon (December to February and June to August). These figures are set by the NMA and can shift from year to year, so always confirm the current published rate before booking, but the seasonal structure itself has been stable for years and mirrors the fee tiers used for other Group A peaks such as Lobuche East and Island Peak.
On top of the NMA climbing permit, you still need the Sagarmatha National Park entry permit and the Khumbu Pasang Lhamu Rural Municipality entry fee, because the standard approach to Mera Peak via Lukla and the Hinku Valley either touches the national park boundary or, on some itineraries, runs through it directly depending on the exact route chosen. A licensed climbing guide is mandatory for Group A peaks, and most trekking companies also require or strongly recommend a dedicated climbing Sherpa with technical mountaineering training for summit day, separate from the trekking guide who leads the approach.
Best Season to Climb Mera Peak
Spring, from mid-March through May, and autumn, from late September through November, are the two windows almost every operator recommends for Mera Peak, for the same reasons they are the preferred seasons for Everest Base Camp itself: stable high-pressure weather patterns, reliably clear mountain views, and manageable overnight temperatures at altitude. Autumn tends to have marginally more settled weather right after the monsoon clears, while spring offers slightly warmer daytime temperatures in the lower Hinku Valley and blooming rhododendron forests on the approach through Panggom, though spring can bring more afternoon cloud buildup as the pre-monsoon season develops.
Winter ascents of Mera Peak are possible for experienced parties, but the combination of bitter cold at High Camp, shorter daylight hours, and the risk of heavy snow closing the Zatrwa La make it a option only for well-prepared, well-equipped teams. Summer and monsoon climbing, from June through August, is generally avoided because of poor visibility, leech-infested lower trails, and the increased avalanche and crevasse risk that comes with fresh snow loading on the summit glacier.
Standard Mera Peak Itinerary
Most Mera Peak climbing packages run 15 to 18 days from Kathmandu to Kathmandu, and follow a broadly consistent pattern regardless of which operator you book with. The trip begins with the short mountain flight from Kathmandu to Lukla, the same airstrip used for Everest Base Camp treks, but instead of turning north toward Phakding and Namche Bazaar, the Mera Peak route turns south and east, climbing through Chutanga and over the Zatrwa La pass at roughly 4,600 meters to drop into the upper Hinku Valley.
From there the itinerary moves up-valley through Kothe, Thangnak, and Khare, the last proper village and the standard acclimatization and gear-check stop before the mountain itself, sitting around 5,000 meters. A rotation day at Khare for acclimatization and a practical session on the nearby Mera La glacier to practice cramponing and rope technique is standard on well-run itineraries. From Khare, climbers move up to High Camp at approximately 5,800 meters, a small rocky perch with dramatic views, before a pre-dawn summit push. Descent typically retraces the same valley back to Lukla, though some itineraries route out via the dramatic Amphu Labtsa pass toward the Everest Base Camp trail for climbers combining both objectives, an option only suitable for strong, well-guided teams given the technical difficulty of that connecting pass.
Acclimatization on the Mera Peak Route
Altitude is the single biggest variable in whether a Mera Peak attempt succeeds, and the itinerary’s built-in rest and acclimatization days matter more than any other preparation you can do. Because the Hinku Valley approach gains elevation more steadily than the busier Everest Base Camp trail, but also has fewer villages and less redundancy if you need to wait out a bad day, a conservative pace with at least one full acclimatization day at Khare, and ideally another lower down in the Hinku Valley, meaningfully reduces the risk of altitude illness derailing the climb. Summit day itself starts at nearly 5,800 meters and tops out above 6,400 meters, altitudes where acute mountain sickness, and in more serious cases high altitude pulmonary or cerebral edema, become real risks if the ascent has been rushed.
A useful rule many experienced operators apply on the Mera route is treating any itinerary shorter than about 15 days with real skepticism, since compressing the acclimatization schedule to save two or three days is one of the most common reasons climbers turn back below the summit or, worse, develop altitude sickness serious enough to require an emergency descent or helicopter evacuation.
Gear and Technical Requirements
Mera Peak sits in an unusual middle ground in the trekking-peak world: it demands real mountaineering equipment for summit day, yet the technical climbing skill required is genuinely modest compared to peaks with exposed rock scrambling or serious crevasse navigation. You will need a pair of insulated mountaineering boots rated for high altitude, not standard trekking boots, since these accept crampons and provide the warmth needed for a pre-dawn summit push in temperatures that regularly fall well below freezing. A general mountaineering harness, a locking carabiner and an ascender or jumar for the fixed ropes typically placed on the steeper summit slopes, crampons fitted to your boots, and a basic ice axe for balance and self-arrest practice round out the core technical kit.
Almost every reputable operator includes a full equipment checklist in the pre-trip briefing and many rent out the technical gear in Kathmandu or in Khare itself, which saves climbers from having to buy specialized equipment they may only use once. Beyond the technical items, the cold-weather layering system you would bring for any high-altitude Himalayan trek applies directly: a good down jacket rated for extreme cold, insulated gloves plus a thin liner pair, a warm hat and balaclava, and several layers of moisture-wicking base and mid layers. Trekking poles are useful on the long valley approach but are typically swapped for the ice axe above Khare.
Mera Peak Compared to Island Peak and Lobuche East
Trekkers weighing Mera Peak against Nepal’s other two most popular Group A trekking peaks, Island Peak (Imja Tse) and Lobuche East, are usually comparing altitude, technical difficulty, and how the climb fits with an Everest Base Camp itinerary. Mera Peak is the highest of the three at 6,476 meters on its main North summit, against Island Peak’s 6,189 meters and Lobuche East’s 6,119 meters, which makes altitude management the defining challenge on Mera even though its climbing gradient is gentler. Island Peak, by contrast, is generally considered more technically demanding near the top, with a short but genuinely steep headwall and more exposure right before the summit ridge, while Lobuche East sits between the two, with a rockier, narrower summit ridge that some climbers find more intimidating despite its lower elevation.
A detailed side-by-side comparison of all three peaks, including which one suits first-time climbers, which pairs best with an Everest Base Camp itinerary, and how each one’s permit costs and logistics differ, is covered in our dedicated guide to the best trekking peaks near Everest Base Camp. Climbers who have already done the standard Everest Base Camp trek and want a natural next step often ask specifically about the existing Island Peak and Everest Base Camp combination itinerary, which pairs the two objectives in a single trip using the Amphu Labtsa connection some strong parties also use to link Mera Peak with the Khumbu.
Guides, Safety and Insurance
A licensed climbing guide is a legal requirement for Mera Peak under NMA rules, and beyond the legal requirement it is simply not a mountain to attempt without one. Route-finding on the Mera La glacier changes from season to season as crevasses open and close, the fixed ropes near the summit need to be checked and sometimes reset, and the altitude and cold at High Camp leave very little margin for a mistake to be self-corrected. Our broader guide to safety on the Everest Base Camp trek covers the altitude, weather, and emergency-evacuation considerations that apply just as much on the Mera approach through the Hinku Valley, since the trek in and out shares many of the same risk factors as the standard EBC route.
Travel insurance for Mera Peak needs to specifically cover climbing to at least 6,500 meters and include helicopter evacuation, since standard trekking insurance policies frequently cap coverage at 6,000 meters or exclude mountaineering activities altogether. This is a detail worth checking carefully before you book, and our dedicated travel insurance guide for the Everest Base Camp trek explains what to look for in a policy, much of which applies directly to Mera Peak with the added requirement of confirming the altitude ceiling covers the summit height.
Cost Breakdown for a Mera Peak Expedition
A typical guided, all-inclusive Mera Peak package booked with a Nepal-based trekking operator runs somewhere in the range of USD 1,800 to 2,800 for around 16 to 18 days, though prices vary with group size, season, and exactly what is included. Budget for the NMA Group A climbing permit, Sagarmatha National Park and rural municipality fees, the Lukla flight, all accommodation and meals on the trek, a licensed climbing guide and porter support, and technical climbing equipment rental if you don’t own it. Items typically excluded are Kathmandu hotel nights outside the trip dates, personal climbing gear you choose to buy rather than rent, tips for your guide and porters, travel insurance, and any costs from an early return or helicopter evacuation.
A useful way to sanity-check a quoted package price is to compare it against our general Everest Base Camp trek cost guide, which breaks down permit fees, teahouse pricing, and daily costs for the standard route; Mera Peak’s valley approach runs through less-visited teahouses with slightly higher prices than the busy Everest Base Camp trail, reflecting the additional cost of supplying more remote lodges, and the NMA climbing permit and technical guide fee sit on top of what a standard trek would cost.
Physical Preparation and Training
Because Mera Peak’s technical demands are modest but its altitude and duration are significant, the training that serves you best is the same cardiovascular and load-carrying conditioning that prepares anyone for a long high-altitude trek, with an added focus on leg strength for sustained step-kicking in snow on summit day. Multi-hour hikes on varied terrain carrying a loaded daypack, stair climbing, and steady-state cardio work such as running, cycling, or swimming for months beforehand build the aerobic base that matters far more at 6,000 meters than raw technical climbing skill.
Our detailed training guide for the Everest Base Camp trek lays out a structured preparation plan covering cardiovascular fitness, strength work, and practical hiking preparation, and the same plan is a solid foundation for Mera Peak, with the addition of a few practice sessions using crampons if you can find a glacier, dry-tool wall, or even a steep snow slope near home, simply to build comfort with the equipment before you rely on it at altitude for the first time.
What fitness level do I need for Mera Peak
You do not need prior mountaineering experience, but you should be comfortable hiking six to eight hours a day on consecutive days over multiple weeks, ideally with some experience at altitude already, even if that experience is limited to a shorter trek like Everest Base Camp or Annapurna Base Camp. Climbers who arrive fit but with no altitude experience at all sometimes still succeed, because the itinerary’s acclimatization days are designed for exactly that situation, but a fitness base is not optional; it is what lets you continue functioning well when the altitude and cold on summit day start working against you.
Do I need prior climbing experience for Mera Peak
No prior technical climbing experience is required for the standard north-side route, which is why Mera Peak is often described as one of the more accessible 6,000 meter peaks in the Himalaya. Your guide will teach you the basics of using crampons, an ice axe, and moving on a fixed rope during the acclimatization days at Khare, and the standard route avoids the steep exposed sections found on peaks like Island Peak. That said, coming in with even a single day of prior crampon or ice-axe familiarization, arranged through a climbing gym or a guided winter hike at home, makes the on-mountain learning curve considerably less stressful.
How does Mera Peak compare in difficulty to Everest Base Camp
Everest Base Camp is a trekking-only itinerary that never requires technical equipment, while Mera Peak adds genuine mountaineering days, altitude above 6,000 meters, and summit-day exposure to cold and thin air that the standard base camp trek does not involve. In terms of trekking fitness and day-to-day walking difficulty the two are broadly comparable through the valley approach, but Mera Peak is unambiguously the harder and more serious undertaking once you factor in the technical glacier travel, the higher altitude ceiling, and the added risks of summit-day climbing.
Can I combine Mera Peak with Everest Base Camp in one trip
Yes, strong and well-prepared climbers sometimes link the two via the Amphu Labtsa pass, descending from Mera Peak’s High Camp area toward the Chukhung and Everest Base Camp side of the Khumbu, though this connecting route is itself a demanding technical pass and is only suitable for experienced parties with a specialized guide, not a standard add-on for first-time trekkers. Most people instead treat Mera Peak and Everest Base Camp as separate trips, often returning for the second after building experience and confidence on the first.
What is the success rate on Mera Peak
Mera Peak has a comparatively high summit success rate among Nepal’s trekking peaks, largely because the standard route avoids serious technical obstacles, but success still depends heavily on weather, acclimatization pace, and individual fitness. Operators who build in adequate acclimatization days and turn back climbers showing signs of altitude sickness before summit day, rather than pushing everyone to the top regardless of condition, tend to report better overall outcomes and fewer emergency descents, which is worth asking about directly when comparing packages.
Choosing the Right Route Through the Hinku Valley
There are two common approaches into the Hinku Valley for Mera Peak: the classic route over the Zatrwa La directly from Lukla, and an alternative that goes via Paiya and Panggom on a slightly longer but gentler path that some operators prefer for better acclimatization pacing in the trek’s early days. The Panggom route through rhododendron and pine forest also passes through a handful of small Sherpa and Rai villages that see far less tourist traffic than the main Everest Base Camp corridor, giving climbers a quieter, more culturally immersive few days before the trail climbs into the high alpine terrain above Kothe.
Whichever approach you take, the trail eventually funnels into the same upper Hinku Valley corridor through Kothe, Thangnak, and Khare, so the choice mainly affects the character and difficulty of the first three to four days rather than the climbing itself. Operators with strong local experience on this route are worth prioritizing over those who primarily run standard Everest Base Camp trips and treat Mera Peak as an occasional add-on, since the Hinku Valley has far fewer villages, lodges, and rescue options than the busy Khumbu trail if something goes wrong.
Planning Your Mera Peak Climb
Mera Peak rewards trekkers who want the genuine experience of standing on a 6,000 meter Himalayan summit, with sweeping views across five of the world’s six highest peaks from the top, without committing to the technical demands of a full mountaineering expedition. Success comes down to three things that are entirely within your control: choosing an operator with real Hinku Valley experience and a properly staffed climbing team, following a conservative, well-acclimatized itinerary of at least fifteen days, and arriving with a solid cardiovascular fitness base built over several months of dedicated training.
If you are still deciding between Mera Peak, Island Peak, and Lobuche East, or weighing a trekking peak against the standard Everest Base Camp trek, our team can walk you through the trade-offs based on your experience level, available time, and goals, and help you choose an itinerary with the acclimatization schedule and support team that gives you the best realistic chance of a safe summit.
Weather and Temperatures on Mera Peak
Temperature swings on the Mera Peak route are extreme even by Himalayan standards, because the itinerary moves from forested valley floor around 2,800 meters up to a summit above 6,400 meters in roughly two weeks. In the lower Hinku Valley through Kothe and Thangnak, daytime temperatures in the main spring and autumn seasons are generally mild, often reaching the mid-teens Celsius in direct sun, while nights drop toward freezing. Once the route climbs above Khare, and especially at High Camp near 5,800 meters, nighttime temperatures regularly fall to minus 15 to minus 20 degrees Celsius or colder, and summit day, which starts two to three hours before dawn to reach the top and descend before afternoon weather moves in, can feel colder still with wind chill.
Wind is as important a factor as raw temperature on summit day; a clear but windy morning can be more dangerous and uncomfortable than a colder, still one, which is part of why guides watch forecasts closely in the days before a summit attempt and will delay a day if conditions look marginal. Bringing a weather-appropriate down suit or a heavyweight down jacket paired with insulated climbing pants, rather than assuming your standard trekking down jacket is sufficient, makes a meaningful difference in comfort and safety during the pre-dawn push.
Environmental and Cultural Considerations
The Hinku Valley and the approach to Mera Peak sit within a fragile high-alpine ecosystem that sees far less tourist traffic than the main Everest Base Camp trail, which means the environmental footprint of each group matters more, not less. Responsible operators carry out non-biodegradable waste rather than burning or burying it, use kerosene or gas for cooking at the higher camps instead of scarce local firewood, and brief clients on leaving no trace at High Camp, where the terrain is rocky and has essentially no capacity to absorb litter or human waste without proper management.
The villages passed through on the Panggom approach, and the seasonal settlement at Khare that exists mainly to serve climbing traffic, are home to Sherpa and Rai communities whose livelihoods increasingly depend on trekking and climbing tourism. Simple courtesies, such as asking before photographing people, dressing modestly in villages, and supporting local teahouses and lodges rather than camping to avoid them, help keep tourism revenue flowing into these communities rather than around them.
Common Mistakes to Avoid on Mera Peak
The most common reason climbers fail to summit Mera Peak is not technical difficulty but a rushed itinerary that does not leave enough time to acclimatize before the final push, so the single best thing you can do to protect your chances is to choose a package of fifteen days or longer and resist the temptation to save money or time by compressing it. A second common mistake is underestimating the cold at High Camp and on summit day, arriving with trekking-grade rather than mountaineering-grade insulation, which becomes a serious safety issue rather than just a comfort problem above 5,800 meters.
A third mistake is skipping the acclimatization and skills day at Khare, either because the itinerary does not include one or because a group chooses to push ahead in good weather; that day’s practice with crampons, the rope, and the ice axe on nearby terrain is what makes summit day itself far less stressful, and skipping it leaves climbers learning unfamiliar equipment for the first time under pressure at altitude. Finally, climbers sometimes underestimate how remote the Hinku Valley is compared with the well-supplied Everest Base Camp trail; lodges are simpler, food options are more limited, and rescue logistics take longer, so travel insurance with helicopter evacuation coverage up to at least 6,500 meters is not optional.
When should I book a Mera Peak expedition
Spring and autumn departures fill up months in advance with established operators, particularly around the popular late-October and mid-April windows when weather odds are best, so booking three to six months ahead gives you the widest choice of departure dates and lets you build in adequate time for training and gear preparation. Last-minute bookings are sometimes possible for smaller private groups but limit your ability to be selective about itinerary length and guide experience, both of which matter more on Mera Peak than on a standard trek.
Is Mera Peak suitable as a first mountaineering objective
Yes, Mera Peak is widely regarded as one of the more approachable introductions to Himalayan climbing precisely because its technical demands are limited to straightforward glacier travel and fixed-rope use rather than steep ice or rock, while still delivering a genuine 6,000 meter summit experience with spectacular views. Climbers considering their first roped ascent often choose between Mera Peak and Island Peak for this reason, and the comparison guide referenced earlier in this article breaks down which of the two suits a true beginner best.
Packing List Essentials for Mera Peak
Beyond the technical climbing equipment already covered, a Mera Peak packing list is best thought of as a standard Everest Base Camp packing list with a heavier cold-weather and mountaineering layer added on top. Our general Everest Base Camp trek packing list is a solid starting point for the trekking days through the lower Hinku Valley, covering base layers, trekking boots, sleeping bags, and the usual documentation and first aid items, and from there you add the summit-specific gear: mountaineering boots, crampons, harness, ascender, ice axe, a helmet for the summit slopes, and a heavier-rated down jacket or full down suit for High Camp and summit night.
A few Mera-specific details are worth flagging separately. Sunglasses or glacier goggles with strong UV protection are essential above Khare, since sun reflected off the glacier and snowfields can cause snow blindness within hours for unprotected eyes, a risk that is easy to underestimate on a clear, cold morning. A four-season sleeping bag rated well below freezing is necessary for High Camp, where teahouse-style lodges give way to a very basic stone shelter or tented camp, and a headlamp with spare batteries is non-negotiable for the pre-dawn summit start, since batteries lose capacity fast in the cold and a backup that has been kept warm inside a jacket pocket can be the difference between a smooth start and a dangerous delay in the dark.
Why Book Mera Peak With a Local Nepal-Based Operator
Mera Peak logistics differ enough from the standard Everest Base Camp trek that the value of a trekking company with genuine, current Hinku Valley experience is higher than it is on the well-trodden Khumbu trail. Local operators who run Mera Peak regularly know current lodge conditions in Kothe, Thangnak, and Khare, keep relationships with the specific climbing Sherpas trained for this route, and can adjust itinerary pacing in real time if weather or a client’s acclimatization is not going to plan, something that is much harder for an overseas agency subcontracting the trip at a distance to manage well.
When comparing quotes, ask specifically how many nights are built in for acclimatization, whether a skills and practice day at Khare is included, what the guide-to-client ratio will be on summit day, and what evacuation plan and insurance verification process the operator has in place. These questions matter more for Mera Peak than they do for a standard trek, because the technical and altitude risks are real, and the difference between a well-run and a poorly-run itinerary shows up most clearly in exactly the kind of decisions, like whether to delay a summit attempt a day for weather, that only an experienced local team is positioned to make well.
How many days does the actual climb take once I reach Khare
From Khare, most itineraries budget one acclimatization and skills day, one day moving up to High Camp, one summit day that also descends back to Khare or even further down-valley in the same push, and a buffer day held in reserve in case weather delays the summit attempt. That means the climbing phase itself, separate from the multi-day trekking approach and return, typically spans four to five days including the buffer, which is why a realistic total itinerary needs the fifteen-plus days discussed earlier rather than trying to compress the whole trip into less time.
Start Planning Your Mera Peak Expedition
Mera Peak offers a rare combination in the Himalaya: a true 6,000 meter summit, five-peak panoramic views that rival anything seen from Everest Base Camp itself, and a technical bar low enough that fit, well-prepared trekkers without prior climbing experience can reasonably attempt it with the right guide team and itinerary. The trade-off is that it demands more from you in preparation, technical gear, and budget than a standard trek, and the margin for cutting corners on acclimatization or equipment is much smaller once you are above Khare.
If Mera Peak sounds like the right next step after Everest Base Camp, or the right first Himalayan summit before you have even done a base camp trek, get in touch and we can put together an itinerary with proper acclimatization pacing, an experienced climbing team, and transparent, all-inclusive pricing so you know exactly what is covered before you commit.
Altitude Sickness Warning Signs to Watch For
Every climber and guide on the Mera Peak route should be able to recognize the early signs of acute mountain sickness: headache, nausea, loss of appetite, dizziness, and unusually disturbed sleep are the common early symptoms, and they are common enough at altitude that mild versions should prompt caution rather than panic. What matters is the trend: symptoms that stay mild and improve with a day of rest and hydration at the same altitude are different from symptoms that worsen, especially if they progress to confusion, loss of coordination, or breathlessness at rest, which can signal the more dangerous high altitude cerebral or pulmonary edema and require immediate descent.
A good guide will monitor the group closely in the days approaching Khare and above, ask direct questions about sleep and appetite rather than just physical symptoms, and will not hesitate to hold a client back from a summit attempt, or send them down with a support Sherpa, if warning signs appear. This is one more reason the choice of operator matters as much as physical fitness: a guide culture that prioritizes safety over summit statistics is what actually keeps climbers safe on a mountain where the nearest hospital-level care is a costly and weather-dependent helicopter flight away.
What should I do if I feel unwell during the climb
Tell your guide immediately rather than trying to push through symptoms quietly, since altitude illness caught early and treated with rest, hydration, or descent almost always resolves well, while altitude illness that is hidden or ignored can escalate quickly. A reputable operator will have a clear protocol, often including supplemental oxygen and Diamox as a preventive or treatment medication used under guide supervision, and pre-arranged evacuation insurance procedures, so understanding that protocol before you leave Kathmandu is worth doing at your pre-trip briefing.
Mera Peak vs a Standard Trek: Is It Right for You
If you are drawn to the idea of standing above 6,000 meters and seeing Everest, Lhotse, Makalu, Kangchenjunga, and Cho Oyu from a single summit, but you are unsure whether you are ready for the technical and altitude demands, an honest self-assessment helps more than any gear list. Ask whether you have completed at least one multi-day trek at altitude before, whether you can commit to several months of structured cardiovascular training, and whether a fifteen-plus day itinerary and the added cost of technical gear and a climbing permit fit your budget and schedule. If the answer to all three is yes, Mera Peak is a realistic and rewarding objective; if you are newer to trekking altogether, building experience first on Everest Base Camp or a similar high-altitude trek, then returning for Mera Peak once you know how your body handles altitude, is often the wiser sequence.
Either way, our team is happy to talk through your experience level and help you decide whether Mera Peak, a standard trek, or a different trekking peak is the better fit for this trip, rather than simply selling you on the most expensive option.
Do children or first-time high-altitude trekkers ever attempt Mera Peak
Because of the altitude and technical elements, Mera Peak is not appropriate for children and is not typically recommended as anyone’s very first experience above 3,000 meters. Operators generally expect participants to be at least 16 to 18 years old, in strong physical condition, and ideally to have some prior trekking experience at altitude, even if that experience came from a shorter trip like Annapurna Base Camp or a first attempt at Everest Base Camp, so that both the climber and the guide team have a realistic sense of how that individual responds to thinner air before committing to a technical summit push.
What permits documentation should I bring for Mera Peak
Your operator will typically handle the paperwork for the NMA climbing permit, Sagarmatha National Park entry, and the rural municipality fee as part of an all-inclusive package, but you should carry your passport with you at all times on the trek, since permit checkpoints along the route and at the national park entrance require it, along with several passport photos that are commonly requested for permit processing in Kathmandu before departure.
Beyond the passport and photos, a signed medical declaration confirming you have no conditions that would be dangerous at high altitude, and proof of travel insurance covering climbing and helicopter evacuation up to at least 6,500 meters, are standard requirements most reputable operators ask for before confirming your booking, since these documents protect both you and the guide team if a medical situation or evacuation becomes necessary partway through the climb.