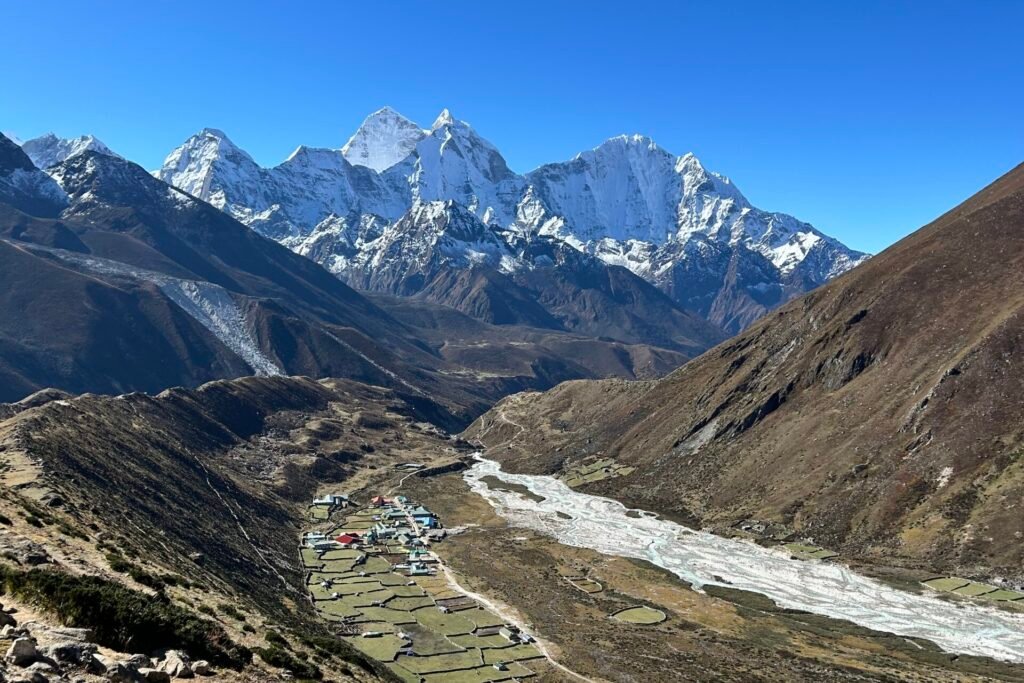
The Everest Base Camp trek is one of the most photographed journeys on Earth, and for good reason. The route from Lukla to Gorakshep passes through a concentration of visual drama that few places on the planet can match: the world’s highest peaks catching the first light of dawn, ancient Sherpa villages nestled below granite walls, glacial valleys carved by forces beyond human scale, and the human faces of an indigenous culture that has lived at extreme altitude for five centuries. Getting these images requires more than pointing a camera at something spectacular. It requires preparation, technical understanding, and the patience to be in the right place when conditions align. This guide covers everything from gear selection and camera settings to the specific locations and timing windows that produce the images most trekkers go home wishing they had captured.
Photography on the Everest Base Camp trek presents a specific set of challenges that differ from most other outdoor photography environments: extreme cold affects battery life and camera mechanics; dust on the lower trails and ice crystals at altitude threaten sensor and lens integrity; rapidly changing light and weather conditions require constant adaptation; and the physical demands of trekking at altitude reduce the patience and energy available for careful photographic work. Understanding these challenges in advance and preparing for them systematically is the difference between a memory card full of compelling images and a hard drive of technical failures and missed moments.
Camera Gear for the EBC Trek: What to Bring and Why
The camera system you bring to the EBC trek is the first and most consequential photography decision you make. The constraints are real: everything you carry adds to your daily trekking load, altitude reduces your energy for managing complex equipment, and some camera systems perform poorly in extreme cold. The following analysis covers the main options and the trade-offs between them.
| Camera Type | Advantages for EBC | Disadvantages for EBC | Best For |
|---|---|---|---|
| Full-frame DSLR (e.g. Canon 5D, Nikon D850) | Maximum image quality; largest sensor dynamic range for high-contrast mountain light; best optical viewfinder in cold; widest lens ecosystem | Heavy (800g–1.2kg body alone); bulky with lenses; more battery drain in cold; conspicuous in villages | Dedicated photographers willing to carry weight; those prioritising print-quality results |
| APS-C DSLR / Mirrorless (e.g. Sony A6700, Fuji X-T5, Nikon Z50) | Good balance of image quality and size; lighter than full-frame; good cold-weather battery performance in newer models; excellent lens options | Smaller sensors show more noise at high ISO for low-light conditions; slightly reduced dynamic range | Most serious amateur photographers; good all-round choice for the route |
| Full-frame mirrorless (e.g. Sony A7R V, Nikon Z8, Canon R5) | Top-tier image quality in a smaller body than DSLR; excellent autofocus; video capability | Battery life shorter than DSLR; electronic viewfinder can struggle in cold; more expensive | Professionals and serious enthusiasts who want maximum quality with manageable size |
| Micro Four Thirds (e.g. OM System OM-5, Panasonic G9 II) | Smallest interchangeable-lens system; good weather sealing (especially OM System); very light; excellent stabilisation | Smallest sensor; most noise at high ISO; dynamic range limitations in extreme contrast situations | Trekkers who prioritise low weight; those doing multi-activity trips |
| Compact/bridge camera (e.g. Sony RX100 VII, Panasonic FZ1000) | Very light; pocketable; good zoom range; no lens changes (no dust ingress); easy to use with gloves | Limited low-light performance; less control; smaller sensor | Casual photographers who want quality but minimal bulk and complexity |
| Smartphone (flagship models) | Always with you; no weight; computational photography compensates for sensor size; sharing immediately possible via WiFi at teahouses | Optical zoom limitations; poor in extreme cold (battery); limited manual control; small sensor struggles with high-contrast Himalayan light | Trekkers prioritising social sharing over archival quality; those with no camera budget |
Recommended Lens Selection for EBC Photography
The choice of which lenses to bring is as important as the camera body itself. The EBC route demands versatility: you need wide angles for mountain panoramas and monastery interiors, moderate telephotos for wildlife and compressed mountain landscapes, and fast primes for low-light teahouse portraits. Bringing everything is not an option when you are already carrying a 10-kilogram pack at 5,000 metres. The following recommendations balance coverage against weight:
| Focal Length (Full-Frame Equivalent) | Primary Use on EBC Trek | Weight Consideration | Priority Level |
|---|---|---|---|
| 16–35mm (wide) | Mountain panoramas from Kala Patthar; monastery interiors; valley landscapes; Everest Base Camp wide shots | Medium (300–500g) | Essential |
| 24–70mm (standard zoom) | General walk-around photography; village scenes; portraits at medium distance; teahouse interiors | Medium to heavy (500–800g) | Essential; this is the workhorse lens on the route |
| 70–200mm (telephoto) | Wildlife (tahr, choughs); compressed mountain views; portraits from respectful distance; isolated peaks | Heavy (700g–1.5kg) | Recommended for dedicated photographers; optional for casual shooters |
| 35mm or 50mm prime (fast, f/1.4–f/1.8) | Low-light interior photography at teahouses; candid portrait work; environmental portraits of Sherpa communities | Light (150–250g) | Excellent weight-to-value ratio; highly recommended as a lightweight complement |
| Macro lens | Wildflowers below 3,500m; prayer stone carvings; textile details | Medium (300–400g) | Specialist interest only; not recommended for typical trekkers |
Essential Accessories for High-Altitude Photography
- Extra batteries (minimum 3 per camera body): Cold reduces lithium-ion battery capacity by 30 to 60 percent. At Gorakshep on a cold morning, a fully charged battery may only last 40 minutes of active shooting. Carry batteries in an inner jacket pocket to keep them warm; swap in cold batteries and warm them against your body while the warm battery depletes.
- Memory cards (minimum 128GB total capacity per system): Carry more than you think you need. Card failures at altitude are demoralising. Use fast cards (V30 or faster) for video; any Class 10 card is adequate for stills. Store backup cards in a separate waterproof bag from the primary cards.
- Camera rain cover or dry bag: Sudden weather changes from clear to snow or rain happen fast on the route, particularly above 4,000m. A simple neoprene rain cover (weight: 60g) protects the camera during the brief scrambles between shelter points. Essential, not optional.
- Circular polarising filter: The single most valuable optical filter for Himalayan photography. Cuts glare from snow, intensifies the blue of high-altitude skies, reduces haze in valley shots, and increases colour saturation in the lower forest sections. A 77mm or 82mm CPL filter with step-up rings covers most lens diameters from a single filter.
- Neutral density filters (3-stop and 6-stop): For long-exposure waterfall shots on the lower trail sections and for smooth sky exposures in bright conditions. Less critical than the CPL but valuable for creative flexibility.
- Lightweight tripod or travel tripod: Critical for the pre-dawn Kala Patthar shoot. A lightweight carbon fibre travel tripod (900g to 1.2kg) enables the slow shutter speeds needed for dawn light on Everest without camera shake. A sturdy monopod is a lightweight alternative that doubles as a trekking pole.
- Lens cleaning kit: The trail below Namche is dry and dusty; the trail above is dry and windy. Dust on the front element and sensor is inevitable. Carry a blower brush, microfibre cloth, and lens cleaning fluid. Sensor cleaning at altitude should be avoided if possible; clean before departure and again in Kathmandu on return.
- Laptop or portable hard drive: If shooting over 12 to 14 days, storage management becomes important. Backup cards to a portable SSD (many teahouses have electricity for charging). Do not rely on a single memory card as your only copy.
Understanding the Light on the EBC Trek
Light quality at high altitude in the Himalayas is unlike anything in the lowlands. The reduced atmosphere means UV radiation is significantly higher, colours are more saturated, and the transition between shadow and highlight is more abrupt. Understanding how this light behaves across the day and across the season transforms your approach to timing and positioning.
Planning Your Everest Trek?
Get local expert advice on cost, itinerary and the best time to go.
The Golden Hours at Altitude
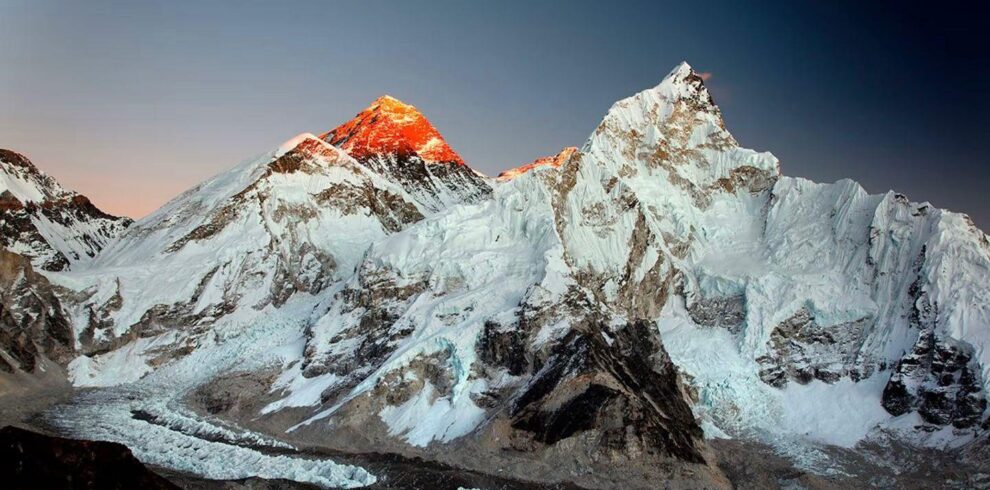
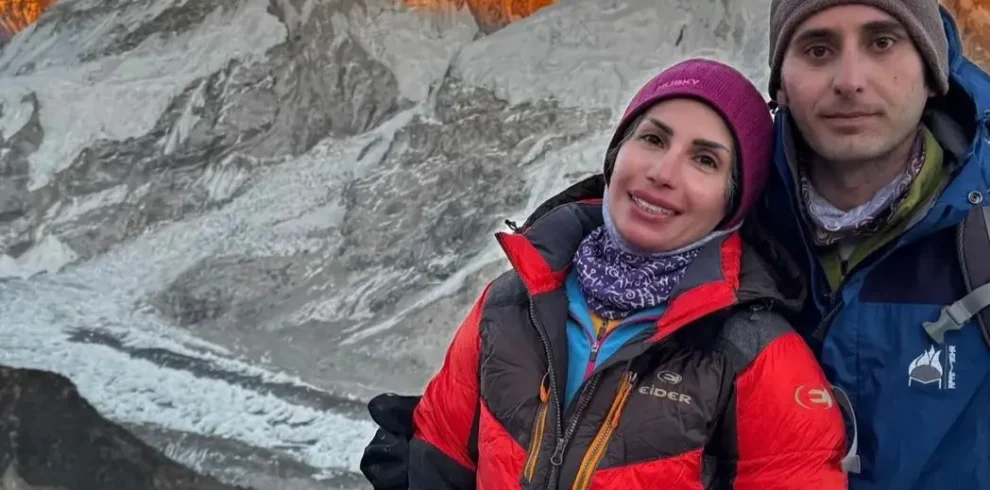
The golden hours before sunrise and after sunset behave differently above 4,000 metres than at sea level. At altitude, the golden hour light is warmer, the shadows are deeper, and the interaction of low-angle light with snow-covered peaks produces colour transitions from deep red through orange to gold that last longer and are more dramatic than anything visible from the lowlands. At Kala Patthar, the pre-dawn light on the south face of Everest is the most photographed phenomenon on the entire route, and for good reason: the transition from deep blue pre-dawn through the sudden burst of alpenglow on the summit pyramid is one of the most spectacular natural light shows available to photographers at any skill level.
| Time of Day | Light Quality | Best Subjects | Settings to Consider |
|---|---|---|---|
| Pre-dawn (4:30am – 5:30am) | Deep blue; stars visible; Everest summit in shadow; building anticipation | Milky Way and stars with peaks as foreground; long exposures; silhouettes | ISO 1600–6400; wide aperture (f/2.8 or wider); 15–30 second exposures; tripod essential |
| Alpenglow (5:30am – 6:00am) | Deep red to orange light touches summits while valleys remain in shadow; most dramatic contrast of the day | Everest and Nuptse summit pyramid; Lhotse face; prayer flags in foreground; Kala Patthar silhouettes | Meter for highlights on the peaks; expose for the lit snow and accept shadow underexposure; bracket exposures for HDR |
| Sunrise (6:00am – 7:30am) | Warm golden light spreading from summits to valleys; shadow details become visible; low-contrast shadows | General mountain panoramas; portraits of trekkers at dawn; glacier surfaces catching light | ISO 100–400; f/8–f/11 for landscape sharpness; graduated ND filter for sky/ground balance |
| Midday (10:00am – 2:00pm) | Harsh overhead light; high contrast; deepened shadows; often cloud-building above 5,000m | Avoid mountain peaks unless clouds provide interest; excellent for close-up textures, prayer stones, flowers | CPL filter to manage sky; expose for highlights; shoot in shade when possible |
| Afternoon (2:00pm – 4:00pm) | Clouds often obscure peaks; warm sidelighting on valley walls; soft diffuse light when overcast | Village life; teahouse interiors; walking shots of trekkers on trail; portrait work in open shade | Higher ISO for interiors; look for catchlight in eyes for portraits; embrace overcast for soft-light portraits |
| Sunset (4:30pm – 6:00pm) | Warm light returns; clouds may clear; alpenglow possible on eastern-facing slopes | Tengboche monastery; Ama Dablam from Dingboche; village life winding down; prayer flags | Similar to sunrise settings; silhouette shots against sky; long exposures on moving prayer flags |
| Blue hour and night (after 6:00pm) | Deep blue ambient light; stars appear above 5,000m with minimal light pollution; teahouse warm light contrast | Teahouse interiors through frosted windows; star trails; Milky Way with peak silhouettes | High ISO; wide aperture; long exposures; tripod; remote shutter release |
Managing High-Contrast Himalayan Light
The single most common technical problem in EBC photography is blown highlights on snow-covered peaks combined with underexposed shadows in the same frame. The dynamic range of a Himalayan mountain scene often exceeds what any camera sensor can capture in a single exposure. Several approaches address this:
- Graduated neutral density filters: A physical grad ND filter (or a reverse grad ND, which darkens the centre of the frame rather than the sky) placed over the sky portion of the frame brings highlights closer to shadow values. Physical filters are more reliable at altitude than post-processing recovery.
- Exposure bracketing and HDR: Shoot three to five exposures at one-stop intervals and merge them in Lightroom or Photoshop. At high ISO in pre-dawn conditions, noise management in the shadow areas is the main challenge.
- Expose to the right (ETTR): In RAW capture, expose as bright as possible without clipping the highlights. RAW files retain significantly more shadow detail than highlight detail, so maximising overall exposure while protecting highlights produces the best recoverable image.
- Shoot in RAW, always: JPEG processing in-camera applies compression and tone curves that reduce dynamic range. RAW files give you full latitude to recover highlights and shadows in post-processing. The file size difference (typically 20–30MB per RAW vs 5–8MB per JPEG) is irrelevant given modern card and storage capacities.
Key Photography Locations on the EBC Route
The EBC route offers compelling photographic subjects at every stage, but certain locations and viewpoints produce images of exceptional quality that justify extra time and effort. The following section covers each major photography destination from Lukla to EBC with specific positioning advice, optimal timing, and the subjects each location offers.
Lukla and the Approach
Lukla itself is underrated as a photography subject. The Tenzing-Hillary Airport, wedged into a steep hillside with its dramatic upward-sloping runway, is visually striking and rarely photographed with care. Arrival and departure mornings offer the spectacle of Twin Otter and Dornier aircraft landing and taking off against a backdrop of Himalayan ridgelines. The airstrip viewing area provides clear sightlines. Early morning light from the east catches the aircraft and the surrounding peaks simultaneously. Lukla town above the airstrip has traditional Sherpa architecture that is disappearing as modern construction replaces it; the older sections of the market street are worth an hour of slow walking with a camera.
Namche Bazaar
Namche is the photography hub of the lower Khumbu. The Saturday market (held every Saturday morning) draws traders from surrounding villages and offers the best opportunity for portrait photography in the region. Yak herders, local farmers, and vendors from Tibetan border communities arrive before dawn and the market is in full swing by 7am. The light in the market bowl at 7am to 8am on a clear day is warm and directional. Arrive early; by 9am the best light has gone and the market is crowding.
The viewpoint above Namche (on the path toward the Everest View Hotel and Khumjung) provides the first clear view of Everest from the trek, framed by the Nuptse ridge and the Lhotse-Nuptse wall. This view is best in morning light when the peaks are clear; cloud typically builds by 10am. The teahouse ridge path above Namche also offers excellent views south toward the lower Khumbu and the hills above Lukla.
Tengboche Monastery
Tengboche is one of the most photographed monasteries in Nepal, and it earns the attention. The monastery sits on a promontory above the confluence of the Dudh Koshi and Imja Khola valleys, surrounded by Himalayan peaks including Ama Dablam (6,812m), which rises directly above the monastery to the southeast and dominates every composition from the monastery grounds. Ama Dablam is widely considered one of the most beautiful mountains in the world, and the Tengboche viewpoint is its definitive portrait location.
The optimal time for Tengboche photography is early morning before the clouds rise from the south. The monastery’s main building faces east and catches the first light; the traditional prayer horn calls that begin around 5am to 6am add audio atmosphere that sharpens the visual experience. The afternoon, when cloud typically fills the valley below Tengboche, creates dramatic light effects as the clouds clear and reconstitute around Ama Dablam. Catch these clearing sequences from the monastery courtyard.
Dingboche and the Imja Valley
Dingboche at 4,410m sits in an amphitheatre of peaks that includes Island Peak (6,189m), Lhotse (8,516m), and the southern walls of Makalu. The morning view from directly above the village looking northeast toward Island Peak and the Lhotse face is exceptional and rarely captured as carefully as it deserves. The chorten-lined upper village path provides foreground interest for long-lens mountain compositions. On the acclimatisation rest day at Dingboche, the walk to Chukhung (4,730m) opens increasingly dramatic views of the Imja Glacier and the eastern approaches to Lhotse and Nuptse.
Lobuche and the Glacier Moraine
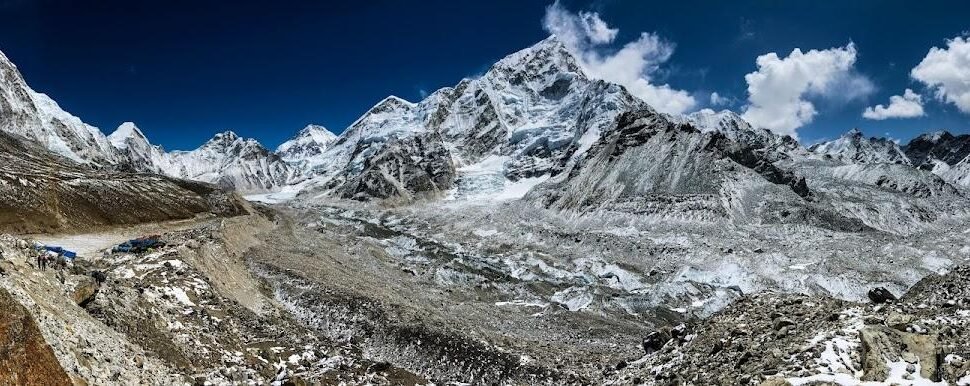
The walk from Dingboche to Lobuche crosses the terminal moraine of the Khumbu glacier and enters a barren, dramatic landscape unlike anything in the lower valleys. The memorial chortens above Lobuche, built for Sherpa and international climbers killed on Everest and Lhotse, are deeply moving subjects. The flat light of afternoon or overcast conditions is better for the memorial than the harsh shadows of direct sun; the muted light suits the subject. The glacier moraine itself, stretching south toward the Khumbu glacier terminus, is a compelling abstract landscape of boulders, ice remnants, and glacially polished rock.
Gorakshep and Kala Patthar
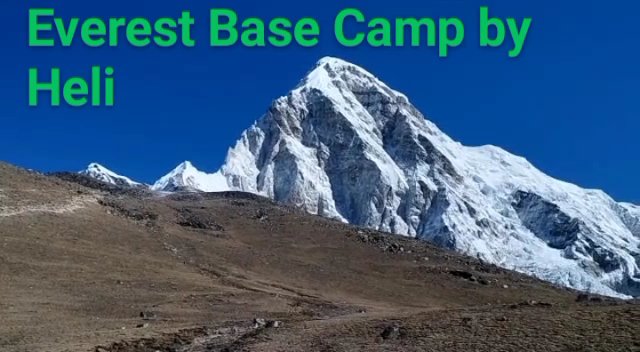
Kala Patthar at 5,644m is the definitive photography destination of the EBC route. The south face of Everest, the full length of the Khumbu glacier, Lhotse, Nuptse, the Pumori ridge, and the complete panorama of the upper Khumbu are all visible simultaneously from the Kala Patthar summit. This is the image that appears on the covers of trekking brochures and in the minds of anyone who has dreamed of the Khumbu for a lifetime. Getting it well requires specific preparation:
- Leave Gorakshep no later than 4:30am (5:00am in spring when sunrise is earlier) to reach the main viewpoint (approximately 5,545m) before alpenglow on Everest, which occurs roughly 30 to 45 minutes before official sunrise.
- The final ridge to the true summit involves loose rocky terrain; in darkness with a headlamp it is slow and requires care. Leave extra time if you want the true summit rather than the lower viewpoint.
- Set up the tripod before the light comes; do not be still adjusting composition when the alpenglow fires. The alpenglow window is often 10 to 20 minutes before direct sun reaches the lower slopes.
- The Pumori face to the west and the Nuptse wall to the east both catch strong early light; do not focus exclusively on Everest and miss the rest of the panorama.
- On descent, the views south from Kala Patthar as the valleys below fill with morning light are spectacular and rarely captured because most photographers turn around after the sunrise show.
Everest Base Camp
Everest Base Camp itself is a more complex subject than many trekkers expect. The camp (5,364m) sits on the Khumbu glacier moraine at the foot of the Khumbu Icefall; in expedition season (April to May) it is a city of coloured tents, prayer flags, and the sounds of the icefall crackling and settling. Out of expedition season, the camp is a largely unmarked area of glacier moraine with prayer flag cairns. The views from EBC itself are less dramatic than those from Kala Patthar, which is worth clarifying for those who assume EBC provides the defining Everest images.
The most compelling EBC photography is of the Khumbu Icefall immediately above camp, the expedition puja cairns at the camp entrance, and the documentary reality of where Everest climbers begin their ascent. In expedition season, the permission and ethical protocols around photographing expedition teams (whose camps are their homes) should be observed: ask before photographing anyone at their camp.
Gokyo Lakes Route: Photography Highlights
Trekkers who take the Gokyo Lakes alternative route to the main EBC route gain access to one of the most visually spectacular landscapes in the entire Himalayan region. The Gokyo Lakes, five glacially dammed lakes at 4,700m to 5,000m, are turquoise-emerald in colour from the glacial minerals suspended in the meltwater. Gokyo Ri (5,357m), the viewpoint above the lakes, provides a panorama that many experienced Himalayan photographers rate above Kala Patthar: Everest, Cho Oyu, Lhotse, Makalu, and the full length of the Ngozumpa glacier are all visible simultaneously on a clear day.
Camera Settings for Himalayan Photography
Technical camera settings for EBC trek photography require adjustments from what works in temperate environments. The extreme contrast, altitude light characteristics, and fast-changing conditions all demand a more deliberate approach to exposure and focus than a typical landscape or travel photography situation.
| Situation | Recommended Mode | Aperture | Shutter Speed | ISO | Key Notes |
|---|---|---|---|---|---|
| Mountain panorama (bright daylight) | Aperture Priority or Manual | f/8 – f/11 | 1/125 – 1/500s (shutter-controlled by camera) | ISO 100–200 | CPL filter; use lens sweet spot; focus 1/3 into scene; check histogram for highlight clipping |
| Alpenglow on peaks (pre-sunrise) | Manual | f/4 – f/8 | 1/30 – 1/125s | ISO 400–1600 | Meter off the lit snow not the dark foreground; bracket ±2 stops; tripod essential |
| Night/Milky Way | Manual | f/1.4 – f/2.8 | 15–25s (500/focal-length rule) | ISO 3200–6400 | Manual focus on bright star; remote shutter release; long-exposure noise reduction OFF (use separate dark frames) |
| Teahouse interiors (candid/portrait) | Aperture Priority | f/1.8 – f/2.8 | Camera-controlled (minimum 1/60s) | ISO 1600–6400 | Minimum shutter set in menu; avoid flash; use window light as directional source; increase exposure compensation +1 to +1.5 stops |
| Wildlife (tahr, birds) | Shutter Priority or Manual | f/4 – f/5.6 (telephoto) | 1/500 – 1/2000s | ISO 400–1600 | Continuous autofocus; burst mode; pre-focus on likely positions; approach slowly and low |
| Moving water / waterfalls | Shutter Priority | f/11 – f/16 | 0.5 – 4 seconds | ISO 100; ND filter if needed | Tripod essential; remote shutter release; 3-stop ND filter for bright conditions; lowest sections of route have best waterfalls |
| Cultural/portrait (outdoor) | Aperture Priority | f/2.8 – f/4 | 1/125s minimum | ISO 400–800 | Always ask permission; approach respectfully; use longer focal lengths for candid work to maintain comfortable distance |
Cold Weather Camera Techniques
At Gorakshep in October, temperatures at dawn can reach -15C to -20C. These conditions affect camera performance in ways that are worth knowing before departure:
- Battery management: Cold battery performance is the primary equipment challenge on the upper route. Maintain spare batteries against your body (shirt pocket, trouser pocket) and rotate them into the camera as needed. A battery that reads 40% in the cold may have 70% actual remaining charge and will recover when warmed.
- Condensation on lenses: When moving from cold outside air into warm teahouse interiors, optical surfaces and sensors fog with condensation. Do not wipe lenses when they are fogged; the moisture is on the outer surface and the temptation to wipe can scratch the coating. Wait for the lens to reach room temperature and the fog will clear without intervention. In extreme cases, place the camera in a sealed plastic bag before entering a warm space; condensation will form on the outside of the bag rather than on the lens.
- LCD performance: LCD screens dim and slow in cold temperatures. The electronic viewfinder in mirrorless cameras may show significant lag below -10C. An optical viewfinder DSLR becomes relatively more reliable at extreme cold compared to mirrorless alternatives.
- Mechanical shutter performance: Lubricants in mechanical shutters stiffen in cold, which can cause shutter speeds to become inaccurate. Modern cameras use self-lubricating shutters that are more cold-tolerant than older mechanisms, but below -20C even modern systems can be affected. Keep the camera under your jacket between shots when possible.
- Glove photography: Operating a camera with thick mountaineering gloves is nearly impossible; thin liner gloves allow some control but reduce dexterity. Photography gloves with removable fingertip sections solve this problem. Prepare camera settings before removing gloves to minimise exposed-finger time at extreme temperatures.
Photographing the Sherpa Community: Ethics and Approach
Portrait photography of the Sherpa and broader Khumbu community is among the most rewarding and most ethically complex aspects of EBC trek photography. The Khumbu has been heavily photographed for 75 years; the communities along the route are accustomed to cameras and have legitimate reasons for fatigue with being photographed casually. Approaching portrait photography with respect and genuine human engagement produces better images and better relationships with the communities you are passing through.
Planning Your Everest Trek?
Get local expert advice on cost, itinerary and the best time to go.
Ethical Guidelines for Cultural Photography
- Always ask permission before photographing individuals. This applies equally to the Saturday market vendors in Namche, the monks at Tengboche, and the elderly residents sitting outside their homes in Khumjung. The phrase “tasvir lincha milcha?” (May I take a photo?) is recognised and appreciated. Many Sherpa people will decline; this is their right and should be respected without negotiation or persistence.
- Do not photograph religious ceremonies or rituals without explicit permission from the officiating monks or community leaders. The Mani Rimdu festival at Tengboche and Thame, in particular, involves sacred practices performed for the spiritual benefit of the community; photographers who treat it as an entertainment spectacle without engaging with its significance are acting poorly toward their hosts.
- Do not pay for photographs. Paying children for photos creates a dynamic where begging for tourist money becomes more attractive than education. The better approach is genuine engagement: ask names, show the image on the screen, establish the kind of human contact that might result in a genuine portrait invitation.
- Be transparent about how the images will be used. If you plan to publish photographs (online, in print, commercially), saying so to the subject and offering to share a copy is the right practice. Some Sherpa communities have become sensitised to commercial use of their images without benefit flowing back to the community.
Technical Approach to Sherpa Portraits
The faces of Sherpa elders and the working faces of porters and guides carry a visual depth that rewards careful photographic attention. Several technical recommendations for portrait work on the route:
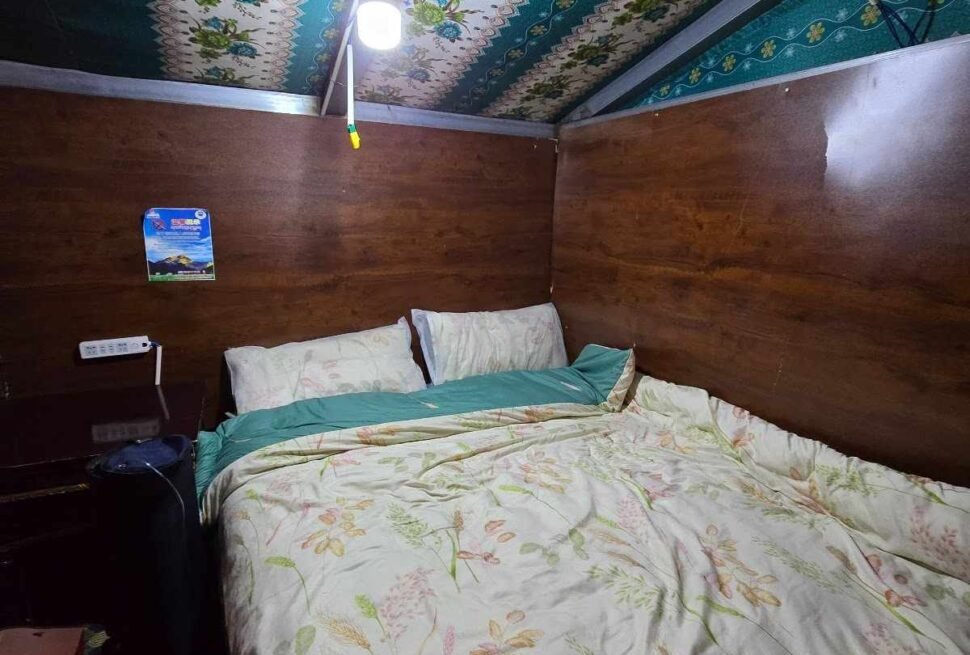
Use a moderate telephoto (85mm to 135mm equivalent) for portrait work; it compresses the perspective flattringly and allows enough working distance to be non-threatening. Open apertures (f/1.8 to f/2.8) separate subjects from backgrounds and draw attention to facial details. The open-shade light of midday or the warm sidelight of mid-morning (9am to 11am) produces better skin tones than direct overhead sun. Teahouse interiors, with their warm wood surfaces, low lighting, and the presence of domestic life, are excellent portrait environments if you can get window light falling on the subject.
Drone Photography on the EBC Trek
Drone photography in Sagarmatha National Park is a subject that requires careful attention because the regulations are specific, the enforcement consequences are real, and the drone photography community’s behaviour in protected areas globally has generated justified restrictions.
| Aspect | Current Situation (2024–2025) |
|---|---|
| Legal status within Sagarmatha National Park | Drone flights require prior written permission from the Department of National Parks and Wildlife Conservation (DNPWC) and the Civil Aviation Authority of Nepal (CAAN). Unauthorised flights are illegal and equipment can be confiscated. |
| Permission process | Applications must be submitted in advance to DNPWC in Kathmandu. Approval is not guaranteed and is typically granted only for research, documentary, or approved commercial purposes with strong supporting documentation. |
| Practical reality for most trekkers | Individual trekkers carrying consumer drones for personal photography very rarely receive permission. The process requires time, a stated purpose, and institutional backing that most independent trekkers cannot provide. |
| High-altitude performance | Even with permission, drone performance above 4,000m is significantly degraded. Thin air reduces rotor lift efficiency; most consumer drones struggle above 4,500m and are unreliable above 5,000m. The pre-dawn cold at Kala Patthar would likely prevent most consumer drones from flying at all. |
| Recommendation | Do not bring a drone to the EBC route expecting to fly it. The combination of legal restriction, practical altitude limitations, and weight cost makes it a poor investment. The photographic results achievable with a good camera on Kala Patthar exceed drone photography in most conditions anyway. |
Post-Processing EBC Trek Photography
The images that come off an EBC trek require thoughtful post-processing to reach their potential. The specific challenges of high-altitude Himalayan photography create recurring post-processing tasks that are worth understanding before you get home with 2,000 RAW files.
Common Post-Processing Adjustments for Himalayan Images
- Snow exposure recovery: Even well-exposed snow shots often have slight clipping in the brightest areas. Lightroom’s highlight recovery slider is effective up to about half a stop of clipping. For more severe clipping, the exposure slider pulled down combined with the highlight slider creates more natural-looking recovery than either alone.
- Shadow recovery in high-contrast scenes: The shadows in alpenglow images and midday mountain shots often need 2 to 3 stops of recovery. Modern RAW files handle this well, but noise in the shadows (particularly from high-ISO pre-dawn shots) will need noise reduction applied after shadow recovery. Apply noise reduction before sharpening.
- White balance correction: The blue cast of open-shade high-altitude scenes and the warm orange of alpenglow both benefit from white balance adjustment. Pre-dawn shots often need the white balance shifted warmer (3,500K to 4,200K); bright daylight shots can go slightly cooler to preserve the deep blue of Himalayan sky.
- Atmospheric haze reduction: Valley views in Nepal often have a blue-grey haze from atmospheric scattering. The Dehaze slider in Lightroom (used conservatively at 20 to 40%) recovers colour and contrast in hazy distance views. Overuse creates an unnatural, over-punched appearance that looks obviously processed.
- Sky colour saturation: The intense blue of high-altitude sky can be further enhanced by targeting the blue channel with selective colour tools. Adding a little blue saturation and pulling back luminance (to deepen the blue rather than lighten it) produces richer sky colour than a simple saturation increase across all channels.
Best Photography Subjects by Trek Stage
| Trek Stage | Key Photography Subjects | Best Timing | Lens Recommendation |
|---|---|---|---|
| Lukla to Phakding | Lukla airport operations; suspension bridges over Dudh Koshi; rhododendron forest; local children | Arrival morning; early afternoon | 24–70mm; wide angle for bridges |
| Phakding to Namche | Multiple suspension bridges; Hillary Bridge; first Himalayan peaks above treeline; yak trains on trail | Morning for forward-facing peaks; any time for trail life | 24–70mm; telephoto for distant peaks |
| Namche Bazaar | Saturday market; first Everest view from Everest View Hotel path; village architecture; gear shops with colourful equipment | Saturday dawn for market; early morning for Everest view | 35–50mm for market; telephoto for Everest view |
| Namche to Tengboche | Mong La viewpoint (panorama of Everest, Lhotse, Nuptse, Ama Dablam); Phunki Tenga suspension bridge; rhododendron forest in spring | Early morning for peak views; spring (April) for rhododendron | Wide to telephoto zoom |
| Tengboche | Ama Dablam portrait; monastery architecture; monks at puja; Mani Rimdu festival (if timing aligns) | Early morning and late afternoon for Ama Dablam; any time for monastery | Wide for monastery; 70–200mm for Ama Dablam |
| Tengboche to Dingboche | Pangboche monastery; Island Peak first views; lower Imja valley | Morning | 24–70mm general; telephoto for Island Peak |
| Dingboche | Chortens above village; Ama Dablam eastern face; Lhotse south face; acclimatisation hike to Chukhung | Early morning; acclimatisation day hike | Wide for chortens/landscape; telephoto for peak details |
| Lobuche | Climber memorial chortens; glacier moraine abstract landscape; Lobuche Peak reflected in pools | Overcast for memorials; golden hour for moraine | 24–70mm; 16–35mm for moraine abstract |
| Gorakshep and Kala Patthar | Alpenglow on Everest; full Khumbu panorama; Kala Patthar descent views; Pumori reflection in thaw pools | Pre-dawn for alpenglow; descent for south-facing views | Wide angle essential; telephoto for peak close-ups |
| Everest Base Camp | Khumbu Icefall from base; expedition puja cairns; expedition season tent city (April-May) | Expedition season for tents; any time for icefall | Wide for icefall scale; standard zoom for camp life |
Protecting Your Equipment on the Trail
Camera equipment faces specific hazards on the EBC trek that require active management. Dust, moisture, physical impact, and altitude-related operational issues can damage or destroy equipment if not addressed proactively.
- Dust protection on the lower trail: The trail between Lukla and Namche passes through dry, dusty sections where the foot traffic of trekkers, yaks, and horses raises significant dust clouds. Camera bags should zip closed completely when not in active use. Lens caps on at all times when not shooting. A gaiter or bag cover over camera bags during yak train passes prevents particulate intrusion.
- Physical protection in the pack: Camera bodies and lenses carried in a pack should be in padded compartments or padded cases that prevent impact damage. The hard rocky terrain of the glacier moraine sections involves occasional stumbles; your camera should survive a pack-on fall without damage if adequately padded.
- Moisture protection: Rain covers are essential for the monsoon-adjacent shoulder seasons (September, May). Quick access to a lightweight rain cover saves the panic of scrambling for protection when afternoon clouds suddenly drop rain. Keep the cover accessible at the top of the camera bag or in a jacket pocket.
- Insurance: Travel insurance for the EBC trek should explicitly cover camera equipment to the replacement value of what you are carrying. Most standard travel insurance policies exclude high-value electronics unless specifically scheduled. Check coverage before departure.
Frequently Asked Questions About EBC Trek Photography
What is the best camera for the Everest Base Camp trek?
The best camera for the EBC trek is the one you will actually carry and use consistently for 12 to 14 days. A mirrorless APS-C camera like the Fuji X-T5, Sony A6700, or OM System OM-5 offers an excellent balance of image quality, weather resistance, battery endurance (with spare batteries), and weight. For those who prioritise maximum image quality and can carry the weight, a full-frame system (Sony A7R V, Nikon Z8, Canon R5) delivers results that smaller sensors cannot match in the extreme contrast and high-ISO demands of pre-dawn Himalayan shooting. Serious photographers should not underestimate the quality achievable with a good APS-C system with quality lenses.
Can I charge camera batteries at teahouses on the EBC route?
Yes, with caveats. Electricity is available at most teahouses from Lukla to Gorakshep, typically from solar panels or micro-hydroelectric systems. However, charging at teahouses often incurs a fee (NPR 300 to 600 per charge point, per hour). The electricity supply can be intermittent, particularly above 4,000m in low-sun periods. A portable USB power bank (20,000mAh or larger) that you charge at teahouses with reliable power and use to charge camera batteries via USB charging cables in your room is more reliable than trying to use teahouse power sockets directly for every charge cycle.
Is it worth bringing a tripod to the EBC trek?
For the pre-dawn Kala Patthar shoot, a tripod or at minimum a monopod is essential. Handholding at f/4, 1/30s, ISO 1600 in sub-zero temperatures with altitude-affected dexterity produces a very low keeper rate. A lightweight carbon fibre travel tripod (GorillaPod, Gitzo Traveller, or Benro TMA28C equivalent) weighing 900g to 1.2kg is a justified addition to the pack for any photographer who considers the sunrise on Everest a primary objective. If the only goal were general daytime photography, a tripod could be omitted; for night and pre-dawn shooting it is not optional.
What photography subjects are most often missed by EBC trekkers?
The subjects that experienced photographers return from the EBC route wishing they had captured more carefully include: the Lobuche memorial chortens (which are almost always photographed in passing rather than given the time they deserve); the Saturday market in Namche (which requires being at the right location before the best light at 7am, not arriving at 9am after breakfast); the descent from Kala Patthar (which offers south-facing mountain views in good light that most trekkers hurry past on the way back); the interiors of teahouses in the golden morning light when porters and guides eat breakfast; and the suspension bridges of the lower Khumbu, which are structurally dramatic subjects that receive cursory treatment from most photographers.
How do I photograph Everest clearly? It always looks small in photos.
Everest appears small in wide-angle photographs because the surrounding peaks (Nuptse at 7,861m, Lhotse at 8,516m) are very large, and Everest’s summit protrudes only a few hundred metres above them when viewed from south-facing viewpoints like Kala Patthar. To make Everest look appropriately dominant in photographs, use a longer focal length (200mm to 400mm equivalent) which compresses the scene and makes the summit-to-surrounding-peaks relationship look more dramatic. The classic wide-angle Kala Patthar panorama always shows Everest as relatively modest in the frame; the telephoto compression of the same view shows it as the colossus it actually is.
What time of year produces the best photography conditions on the EBC trek?
October produces the clearest skies and best overall photography conditions of any month on the EBC route. The post-monsoon atmosphere is washed clean by the rains, producing exceptional visibility. The autumn colours in the lower birch and rhododendron forest sections (below Tengboche) add foreground interest that the spring and winter routes lack. The October full moon provides dramatic night photography opportunities on the upper route where light pollution is absent. Spring (April) offers rhododendron bloom in the lower valleys and the spectacle of active expedition camps at Base Camp, but visibility is generally lower than October due to pre-monsoon haze and cloud buildup.
Building a Photography Itinerary for the EBC Trek
Dedicated photographers should consider building extra days into their EBC itinerary specifically for photography opportunities. The standard 12 to 14 day itinerary leaves little time for extended shoots or waiting for light. Adding one extra day at Namche (which also benefits acclimatisation), one extra day at Tengboche, and one extra day at Dingboche gives you the flexibility to wait for the right light, to revisit the Saturday market if your first visit was clouded over, and to explore the Chukhung valley for Island Peak photography. The total cost in time is three extra days; the improvement in photographic output is disproportionately larger.
Planning the EBC trek with a reputable operator like Everest Trek Company allows for itinerary flexibility, including additional rest and photography days at key locations, without the logistical complexity of self-organising accommodation changes. An experienced guide who knows the route can also point out photography opportunities that a first-time visitor would miss: the viewpoint above Phortse that no trekking brochure ever features, the reflection pool near the Lobuche junction that appears for only a few weeks in the autumn melt season, the specific angle from the Tengboche ridge that captures Ama Dablam with prayer flags in the foreground at the precise moment when the light is right.
The EBC trek is a photography destination of the highest order. The combination of natural grandeur, cultural richness, and the specific quality of high-altitude Himalayan light produces images that are among the most compelling landscape and travel photographs available anywhere in the world. With the right preparation, the right equipment, and the willingness to be in position before dawn and to stay after the crowd has moved on, the images that come home from the Khumbu will be among the strongest work of any photographer’s career.
Film vs Digital on the EBC Trek: A Note on Format
A small number of dedicated film photographers still carry medium-format or 35mm film cameras to the Khumbu. The qualities that make film appealing for Himalayan photography are real: the tonal gradation of colour negative film in high-contrast situations is smoother than most digital sensors at extreme exposure values; the grain structure of high-speed black-and-white film suits the texture of glacial moraine and monastery stone; and the discipline of shooting on a limited number of frames forces a more considered compositional approach than the 1,000-frame digital day encourages.
The practical challenges of film at altitude are considerable. Cold temperatures affect film advance mechanisms in many cameras; lubricants stiffen in the same way as digital shutters. Film emulsions become brittle and can crack in extreme cold when advancing rapidly. Film storage at altitude must avoid moisture. The weight of carrying enough film for a 14-day trek (at 3 rolls per day for an active shooter, 40-plus rolls) is significant. And the impossibility of reviewing images on the trail means compositional errors and exposure miscalculations are only discovered on return. Film photographers who accept these constraints report the experience of shooting at altitude with deliberate attention as qualitatively different from, and in some ways superior to, the more reflexive approach that digital enables.
Video on the EBC Trek: Considerations and Recommendations
More trekkers are carrying video-capable cameras or action cameras to the EBC route with the intention of documenting the journey in moving image. The Khumbu is spectacular enough that video documentation of even modest technical quality is compelling. Several specific considerations apply to video work on the route:
Stabilisation
Handheld video at altitude, with the physical fatigue and mild breathlessness that characterises walking above 4,000m, produces footage with significantly more camera shake than at sea level. Optical image stabilisation in the lens or body helps; an electronic gimbal (DJI RS3 Mini weighs approximately 800g) produces the buttery-smooth footage that social media audiences expect. The weight cost of a gimbal on a 14-day trek is a real consideration; the stabilisation benefit is also real. A lighter alternative is in-body image stabilisation (IBIS) combined with a wide-angle focal length, which together can produce acceptable handheld video.
Action Cameras
GoPro-style action cameras (GoPro Hero 12, DJI Action 4) are popular accessories on the EBC trek because they are light, waterproof, and capable of capturing perspective that a main camera cannot: chest-mounted views of the trail at pace, helmet-mounted summit views on Kala Patthar, time-lapses of cloud movement over the Khumbu glacier. Their small sensors produce footage that, when well-lit, is compelling; in low light (the most interesting light) the noise and compression artefacts are significant. As a secondary system alongside a main camera rather than as a replacement, an action camera adds genuine value. As the only camera on the trek, the limitations become more apparent.
Time-Lapse Photography
The EBC route is extraordinary time-lapse territory. The movement of clouds through the Khumbu valley, the alpenglow transition on Everest’s south face, the movement of prayer flags in the wind, the opening and closing of the market in Namche, the passage of yak trains on the trail below Namche are all compelling time-lapse subjects. Most modern cameras have built-in interval timers for time-lapse capture; a tripod and a fully charged battery (or external power source via USB-C on newer cameras) are the main additional requirements. A one-hour time-lapse at 5-second intervals produces 720 frames, which at 24fps gives 30 seconds of footage. The resulting clips, compressed against the epic backdrop of the Khumbu, are often the most shared elements of EBC travel videos.
Photography Workshops and Guided Photo Treks in the Khumbu
For photographers who want structured guidance rather than independent exploration, photography-focused EBC trek itineraries are available through specialised operators. These trips are led by professional photographers and are designed around photographic objectives: extended time at key viewpoints, pre-dawn starts timed for specific light conditions, and in-field instruction on composition, exposure, and post-processing.
Photography workshop treks typically run longer itineraries than standard EBC packages (16 to 21 days is common) to allow time for extended location work and repeat visits to key spots in different light. Group sizes are small (6 to 10 participants) to reduce the visual and logistical chaos of larger groups. The trade-off is cost: photography workshop treks are significantly more expensive than standard packages. For photographers at a critical skill development stage or those whose primary purpose in visiting the Khumbu is photographic rather than athletic, the structured learning environment can produce results that independent trekking rarely achieves in the same timeframe.
Sharing and Publishing EBC Trek Photography
The images that come back from an EBC trek often represent the strongest landscape and travel photography work of a photographer’s career. Publishing and sharing them thoughtfully produces both personal satisfaction and, where appropriate, commercial opportunity.
Social Media and Online Sharing
Instagram, Flickr, and 500px are the primary platforms for Himalayan photography sharing. The EBC trek hashtag community is large and engaged; well-composed images of Kala Patthar alpenglow, Tengboche with Ama Dablam, and Namche market life consistently reach wider audiences than equivalent images from less storied destinations. When sharing images of recognisable individuals from the Sherpa community, consideration of privacy and consent is important; posting portraits of community members without their knowledge, particularly to commercial accounts with advertising content, raises ethical issues even where it is technically legal.
Print and Editorial
Himalayan photography has a sustained editorial market. Travel magazines, trekking guidebooks, outdoor gear brands, and conservation organisations regularly license Himalayan imagery. Getty Images, Alamy, and National Geographic Creative are the primary stock agencies with active Himalayan collections. Niche agencies including Nature Picture Library and Robert Harding Picture Library have dedicated Himalayan portfolios. For photographers considering commercial licensing of their EBC images, shooting at the highest possible resolution (full RAW file, no crop applied in camera), maintaining accurate metadata (GPS coordinates, date, caption, model release status for portraits), and delivering technically clean files (no sensor dust, no softness, correct white balance) are the minimum requirements for editorial acceptance.
The EBC trek produces enough photographic material in 14 days to fill multiple print portfolios and support a sustained editorial submission program. Photographers who approach the trek with commercial licensing as a secondary objective (rather than as the primary experience) find that the combination of the world’s most dramatic landscapes and careful advance preparation produces work that the market consistently values.
Photography Checklist for the EBC Trek
| Category | Item | Priority |
|---|---|---|
| Camera system | Camera body (weather-sealed preferred) | Essential |
| Camera system | Wide-angle lens (16–35mm equivalent) | Essential |
| Camera system | Standard zoom (24–70mm equivalent) | Essential |
| Camera system | Telephoto (70–200mm equivalent) | Recommended |
| Camera system | Fast prime (35mm or 50mm, f/1.8) | Recommended |
| Power | Spare batteries (minimum 3 per body) | Essential |
| Power | USB-C or proprietary charger | Essential |
| Power | Portable 20,000mAh power bank | Strongly recommended |
| Storage | Memory cards (128GB total minimum) | Essential |
| Storage | Portable SSD or laptop for backup | Recommended for 14+ day treks |
| Filters | Circular polarising filter | Essential |
| Filters | Graduated ND filter (3-stop) | Recommended |
| Filters | Solid ND filter (6-stop or 10-stop) | Optional |
| Support | Lightweight travel tripod | Essential for dawn shoots |
| Support | Remote shutter release | Recommended |
| Protection | Camera rain cover | Essential |
| Protection | Lens cleaning kit (blower, cloth, fluid) | Essential |
| Protection | Padded camera bag or insert | Essential |
| Photography gloves | Fingerless or removable-tip gloves | Essential above 4,000m |
Planning Your Everest Trek?
Get local expert advice on cost, itinerary and the best time to go.