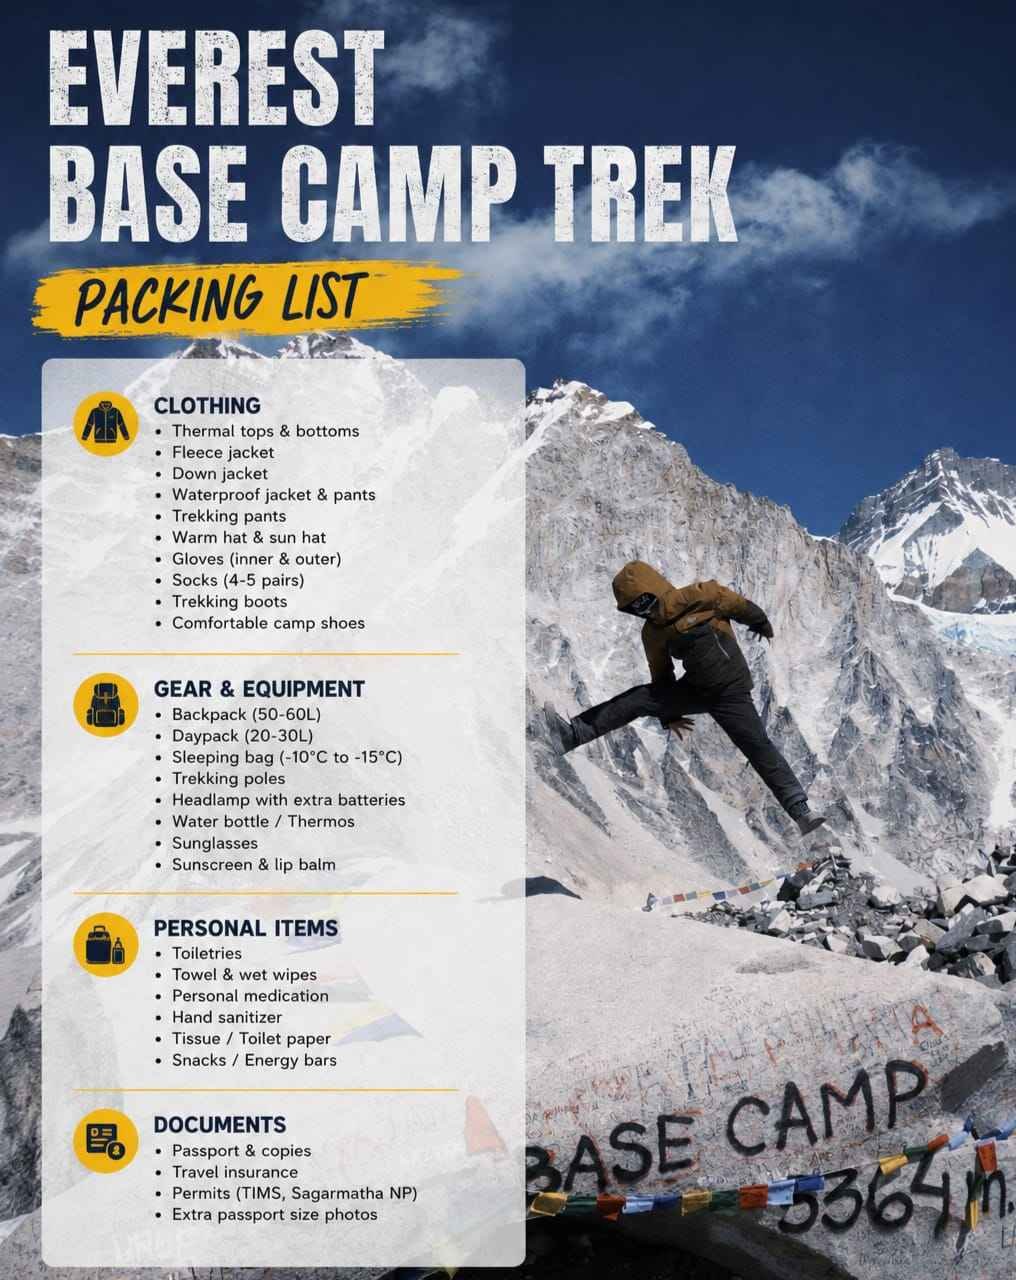
Packing the right gear for the Everest Base Camp trek is one of the most important parts of your preparation. Too little gear and you’ll be cold, uncomfortable, or caught short in an emergency. Too much and you’ll be carrying an unnecessarily heavy bag up to 5,364m. This packing list is designed around what you actually need — no fluff, no unnecessary extras.
Almost everything on this list can be rented or purchased in Kathmandu’s Thamel district if you don’t own it already, at a fraction of the cost of buying at home.
Clothing and Layering System
The EBC trek requires a three-layer clothing system for the upper and lower body: a moisture-wicking base layer, an insulating mid-layer, and a wind/waterproof outer shell. Temperatures range from around 18°C near Lukla to -20°C on summit days at Kala Patthar, so layers that can be added or removed throughout the day are essential.
Planning Your Everest Trek?
Get local expert advice on cost, itinerary and the best time to go.
Upper Body
- Moisture-wicking base layer (x2) — merino wool or synthetic; wool regulates temperature better and stays odour-free longer
- Fleece or softshell mid-layer — for insulation during rest breaks and cooler mornings
- Down jacket (700+ fill power) — essential above 3,500m for evenings and rest stops; this is the single most important warm layer on the trek
- Waterproof and windproof outer shell jacket — protects against wind, rain, and snow; Gore-Tex or equivalent recommended
- Light trekking shirt or T-shirt (x2–3) — for warmer, lower-elevation days
Lower Body
- Trekking trousers (x2) — quick-dry, zip-off designs are versatile for variable temperatures
- Thermal base layer leggings — for cold evenings and high-altitude sections
- Waterproof over-trousers — for rain and snow protection
Extremities
- Warm hat / beanie — wool or fleece; you lose significant body heat through your head at altitude
- Sun hat or cap — UV radiation is intense at altitude; protect your face and neck
- Balaclava — optional but highly recommended for Kala Patthar summit in cold seasons
- Lightweight liner gloves — for moderate cold while still needing dexterity
- Warm insulated gloves or mittens — for high elevations, especially Kala Patthar in October–November
- Merino wool or thermal socks (x4–6 pairs) — wool is best for warmth even when wet
- Lightweight camp shoes or sandals — for wearing inside teahouses; gives your feet a rest from boots
Footwear
- Waterproof trekking boots — ankle-high, broken-in before the trek; this is the most critical gear item; do not use new boots on trek day 1
- Trekking gaiters — useful for muddy sections and light snow; optional for standard EBC route
Sleeping
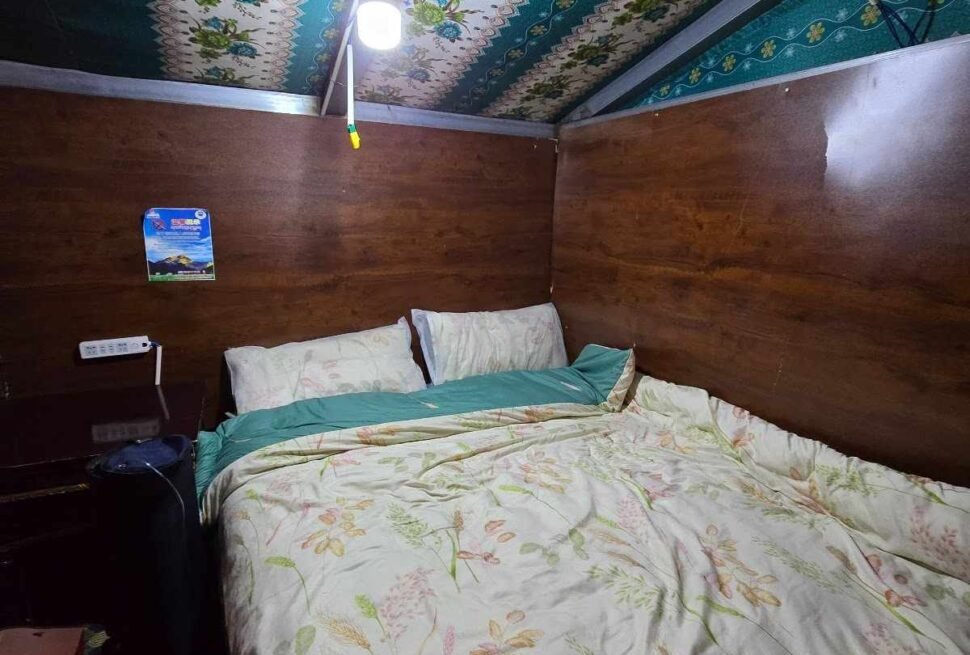
- Sleeping bag rated to -15°C to -20°C — teahouse blankets exist but are thin and may be damp; a quality sleeping bag is non-negotiable for comfort above 4,000m
- Sleeping bag liner — adds warmth and keeps the sleeping bag cleaner; useful in all seasons
Bags and Carrying System
- Main duffel bag (60–80L) — carried by your porter; soft-sided duffel is easier for porters than a rigid backpack
- Day pack (20–30L) — what you carry yourself on the trail each day; should hold water, snacks, layers, camera, first aid, and documents
- Rain cover for day pack — essential; pack one even in dry season for sudden showers
Trekking Equipment
- Trekking poles (pair) — significantly reduce knee stress on descents; adjustable and with anti-shock mechanism is ideal
- Headlamp with extra batteries — for early morning Kala Patthar summits and power cuts at teahouses
- Sunglasses (CE-rated UV400 or glacier glasses) — very important; UV radiation at altitude can cause snow blindness
- Water bottles or hydration bladder (2L minimum) — carry enough to stay hydrated between water sources
- Water purification method — tablets (iodine or chlorine), Steripen UV purifier, or squeeze filter; saves significant money vs buying bottled water at altitude
Electronics and Power
- Power bank (20,000mAh or higher) — teahouses charge per device charge and power is not always reliable; a large power bank keeps your phone, camera, and GPS charged for several days
- Universal plug adapter — Nepal uses Type C, D, and M sockets
- Camera or phone — the Khumbu views are extraordinary; whatever you use, protect it from cold (batteries drain fast in cold)
- Spare memory cards and batteries — electronics fail more often in cold
Hygiene and Health
- Sunscreen SPF 50+ — apply daily; UV radiation is intense above 3,000m even on cloudy days
- Lip balm with SPF — lips crack and burn at altitude
- Hand sanitiser — for pre-meal hygiene on the trail
- Toilet paper and a small trowel — some sections of trail have limited facilities
- Wet wipes — for quick freshen-ups when hot water isn’t available
- Toothbrush, toothpaste, and basic toiletries — keep to a minimum for weight
First Aid Kit
- Ibuprofen and paracetamol — for headaches, muscle pain
- Diamox (acetazolamide) — altitude sickness prevention/treatment (prescription required)
- Blister treatment — Compeed or moleskin
- Rehydration salts — for stomach issues or dehydration
- Antihistamines
- Antibiotics for traveller’s diarrhoea — Ciprofloxacin or Azithromycin (discuss with your doctor pre-trek)
- Bandages and antiseptic wipes
- Pulse oximeter — measures blood oxygen saturation; small, inexpensive, and invaluable for monitoring altitude health
Documents and Money
- Passport — required for permit checkpoints
- Trekking permits — Sagarmatha NP permit and Khumbu Pasang Lhamu Rural Municipality permit; your guide can carry copies
- Travel insurance documents — carry a printout and have a digital copy
- Nepal Rupees cash — ATMs are available in Namche Bazaar; carry enough cash for the full trek above Namche as there are no ATMs higher up
What NOT to Bring
- Heavy books or excessive reading material — download digital books instead
- Jewellery or valuables — leave at your Kathmandu hotel safe
- More than 2 pairs of trekking trousers — you’ll wash at teahouses
- Large laptop — a tablet or e-reader is sufficient if you need a device
- Unnecessary toiletries — travel-sized everything; weight adds up
Gear You Can Rent or Buy in Kathmandu
If you don’t own specialist gear, Thamel in Kathmandu has dozens of reputable rental and purchase shops. For a 14-day trek, renting saves money and avoids the hassle of transporting bulky gear internationally. Items commonly rented:
- Down sleeping bags (-15°C to -20°C)
- Down jackets
- Trekking poles
- Trekking boots (try to bring your own if possible — fit matters enormously)
- Duffel bags
- Waterproof jackets
Inspect all rental gear carefully before accepting it. Check sleeping bag fill, jacket insulation, and boot sole integrity. Ask for gear from a reputable source and confirm the quality before you leave Kathmandu.
Recommended Pack Weight
Your main duffel (carried by porter): aim for under 12–14kg. Most porter agreements specify a maximum of 10–15kg, with the lower end being more considerate of your porter’s welfare.
Your day pack: aim for under 8–10kg. You’ll carry this yourself every day. The lighter your day pack, the more enjoyable the trek.
Trek with Everything Sorted
Our Everest Base Camp Trek packages include comprehensive pre-departure gear guidance and a detailed packing checklist tailored to your specific season. We can advise on what to prioritise for autumn versus spring treks and help source any gear you’re missing in Kathmandu. View our EBC Trek package for more information.
Layering Strategy Explained in Detail
The core principle behind packing for this trek is layering rather than relying on one or two heavy items, since temperatures swing dramatically between the warm midday sun at lower elevations and the sub-zero cold of early mornings and evenings at higher altitude. A proper system consists of a moisture-wicking base layer against the skin, an insulating mid layer such as fleece or light down, and a waterproof, windproof outer shell, with the ability to add or remove layers throughout each day as conditions and exertion levels change.
This system is more effective and more versatile than fewer, heavier garments because it lets you fine-tune your temperature precisely rather than being stuck either too hot or too cold, and it also means a torn or lost single layer does not leave you without any protection, since the remaining layers still provide partial coverage.
Base Layers: What to Bring and Why
Merino wool or synthetic base layers, both top and bottom, are strongly preferred over cotton, which retains moisture and dries slowly, a genuine problem when sweat-soaked cotton next to skin can contribute to dangerous heat loss once you stop moving in cold air. Pack at least two to three base layer sets so you can rotate while others dry, since laundry facilities are limited to occasional teahouse services higher up the trail.
Merino wool has the added advantage of resisting odor buildup better than synthetic alternatives, useful on a trek where washing facilities are minimal for most of the two-week itinerary. A lightweight, long-sleeved sun layer is also worth including for the strong high-altitude sun exposure on clear days at lower elevations.
Mid Layers and Insulation
A fleece jacket or light synthetic insulated jacket serves as your primary mid layer for most of the trek, worn over your base layer during cooler parts of the day and removed when the sun is out and you are exerting yourself on an uphill stretch. A heavier down jacket, rated for temperatures well below freezing, becomes essential from Dingboche onward and especially for the pre-dawn Kala Patthar summit attempt, when temperatures can drop to minus fifteen or twenty degrees Celsius or colder.
We recommend a down jacket with a hood for maximum warmth with minimum added weight, and one that packs down small enough to stuff into your daypack during the warmer, lower-altitude days early in the trek when it is not yet needed.
Outer Shell: Waterproof and Windproof Protection
A breathable, waterproof, windproof jacket and matching trousers round out the layering system, protecting against rain in the lower forested sections of the trail and against biting wind at higher altitude, where windchill can make an otherwise mild temperature feel dangerously cold. Look for a jacket with pit zips or other ventilation options, since trapped moisture from sweat inside a fully sealed shell becomes its own problem during steep uphill sections.
While snow is uncommon but not impossible on this route outside the main trekking seasons, a properly waterproof shell, not merely water-resistant, is worth the investment given how quickly wet clothing becomes a serious risk factor for hypothermia at altitude.
Footwear: Boots, Socks and Trail Shoes
A well broken-in pair of waterproof trekking boots with ankle support is the single most important piece of gear on this list, and the biggest mistake we see is trekkers arriving in brand new boots never worn outside a shop. Break your boots in over at least several weeks of regular walking before departure, ideally on varied terrain including hills, to identify and resolve any hot spots or fit issues before they become blisters on the trail itself.
Pack two to three pairs of quality trekking socks, ideally a wool or wool-blend, along with a thin liner sock pair for trekkers prone to blisters, since the liner reduces friction between foot and boot. Many trekkers also bring a pair of lightweight camp shoes or sandals to wear around the teahouse in the evening, giving tired feet a break from boots after a full day of walking.
Hands, Head and Face Protection
A lightweight pair of liner gloves for general use, plus a heavier insulated or down mitten for high-altitude mornings and the Kala Patthar summit attempt, covers the full range of conditions you will encounter. A warm hat that covers the ears is essential for camp evenings and early starts, alongside a sun hat or cap with a brim for the strong midday sun exposure at lower and middle elevations.
A buff or neck gaiter is a small, versatile item worth including, useful as face protection against wind and cold dust on windy stretches of trail, as an extra layer under a hat, or simply as a scarf in camp in the evening. Good quality sunglasses with strong UV protection are non-negotiable, since glare off snow and high-altitude sun exposure can cause genuine eye damage over the course of a two-week trek.
Sleeping Bag and Sleep System
A four-season sleeping bag rated to at least minus fifteen to minus twenty degrees Celsius is necessary for the higher teahouses, where indoor heating is minimal to nonexistent outside the shared dining room in the evening. Down bags offer the best warmth-to-weight ratio, though synthetic bags perform better if there is any risk of the bag getting wet, since down loses much of its insulating capacity when damp.
A sleeping bag liner adds several extra degrees of warmth and, importantly, keeps the bag itself cleaner over the course of the trek, extending its usable life and improving hygiene in shared teahouse rooms where bedding is not washed between every guest. We can arrange a rental sleeping bag for clients who prefer not to travel with their own, a detail worth asking about if you are trying to minimize luggage.
Trekking Poles and Their Real Benefit
Adjustable trekking poles significantly reduce strain on knees and ankles, particularly on the steep, sometimes loose-surfaced descents this route includes, and many trekkers find them equally useful for maintaining balance on suspension bridges and rocky, uneven sections of trail. We recommend collapsible, lightweight aluminum or carbon poles that pack down small enough to strap to a daypack when not in use.
Trekkers who have never used poles before should practice with them on a training hike prior to departure, since there is a genuine technique to using them efficiently, and arriving on the trail with poles you have never actually walked with can be more hindrance than help for the first day or two.
Daypack and Duffel Bag Setup
Most itineraries use porters or yaks to carry the bulk of your gear in a duffel bag between teahouses each day, while you carry only a daypack of twenty to thirty liters containing the items you need during the day’s walk: water, snacks, a camera, sunscreen, an extra layer, and any personal medication. Check with your operator on the porter weight limit, typically around twelve to fifteen kilograms per duffel, and pack accordingly.
A rain cover for both the daypack and duffel bag is worth including given how quickly weather can change in the mountains, and a few dry bags or heavy-duty ziplock bags inside the duffel help keep clothing separated and protected even if the outer bag gets wet during a porter’s river crossing or an unexpected downpour.
Health and Personal Care Items
A comprehensive personal first aid kit should include blister plasters, any prescription medications in their original packaging, altitude sickness medication such as acetazolamide discussed with your doctor before departure, basic pain relievers, rehydration salts, and any personal medical items specific to your own health history. Our guides carry a more extensive medical kit for the group, but personal medications are each trekker’s own responsibility to carry.
Hand sanitizer and a small supply of tissues or toilet paper are worth carrying at all times, since teahouse and trail facilities vary considerably in what they provide. Sunscreen with a high SPF rating and lip balm with SPF are essential given the intensity of high-altitude UV exposure, which is considerably stronger than at sea level even on cloudy days.
Water Purification and Hydration
Staying well hydrated is one of the most effective things a trekker can do to reduce the risk of altitude sickness, and most trekkers need to drink three to four liters of water per day on this trek. Bottled water is available to purchase at teahouses but becomes increasingly expensive at higher elevations and creates plastic waste in an environment with no real recycling infrastructure, so we recommend a water purification method instead.
A combination of a reusable water bottle or hydration bladder along with purification tablets, a UV purifier pen, or a filtered water bottle lets you refill from teahouse taps or boiled water sources throughout the day at a fraction of the cost and environmental impact of buying bottled water at every stop. Many teahouses along the route now offer boiled or filtered water refill stations specifically to reduce single-use plastic, and we encourage clients to use these wherever available.
Electronics and Power
A power bank of at least 10,000 to 20,000 mAh capacity is worth carrying, since charging via teahouse outlets becomes progressively more expensive the higher you climb, often several dollars per device per charge above Namche Bazaar. Solar chargers are an option but depend on consistent sun exposure and are less reliable than a good power bank for daily charging needs.
A universal travel adapter is necessary since Nepal uses a different plug configuration than many countries, and a basic headlamp with spare batteries is essential both for early starts and for teahouses where electricity is limited or shuts off overnight. Keep all electronics and spare batteries in an easily accessible part of your daypack, since cold temperatures drain batteries faster than usual.
Documents and Money
Carry your passport, a printed copy of your travel insurance policy and emergency contact information, and several passport-sized photos, which are sometimes required for trekking permits obtained along the route. Keep photocopies of your passport and insurance documents separate from the originals in case anything is lost.
Cash in Nepali rupees is necessary for the trek itself, since card payment is essentially unavailable once you leave Kathmandu, and ATMs become sparse above Namche Bazaar, with unreliable availability and higher withdrawal fees at the ones that do exist. We recommend withdrawing or exchanging enough cash in Kathmandu to cover tea, snacks, hot showers, WiFi, and tips for the entire trek, budgeting a bit more than you expect to need.
What Not to Bring
Cotton clothing of any kind is best left at home, since it retains moisture, dries slowly, and offers poor insulation when wet, all genuine risks at altitude rather than minor inconveniences. Heavy, non-packable items such as a full-size pillow, excessive changes of regular clothing, or a hardshell suitcase have no place on this trek, where every kilogram matters both for your own comfort and for the porters carrying your duffel bag each day.
Trekkers sometimes overpack electronics, bringing a laptop, tablet, and multiple cameras when a phone and a single dedicated camera would suffice, adding unnecessary weight and charging demands for a trip where connectivity and power are both limited. We are happy to review a packing list with clients before departure to help identify anything that can reasonably be left behind.
Renting Gear in Kathmandu
Thamel, Kathmandu’s tourist district, has dozens of trekking gear shops offering rental down jackets, sleeping bags, and even trekking poles at reasonable daily rates, a practical option for trekkers who do not want to invest in gear they may only use once, or who are traveling from a warm climate and do not already own cold-weather equipment. Rental quality varies between shops, so we recommend renting from a shop with good recent reviews rather than simply the cheapest option.
We can help arrange gear rental in Kathmandu as part of your trip preparation, and our team knows which shops in Thamel offer reliable, well-maintained equipment suitable for the altitudes and conditions this trek involves.
A Sample Complete Packing Checklist
Upper body: moisture-wicking base layers, fleece or light insulated mid layer, heavyweight down jacket, waterproof and windproof shell jacket, sun-protective long-sleeve shirt. Lower body: moisture-wicking base layer bottoms, trekking trousers, waterproof shell trousers, and quick-dry shorts for lower, warmer sections. Footwear: broken-in waterproof trekking boots, three pairs of trekking socks, liner socks, camp shoes or sandals.
Accessories: warm hat, sun hat, buff or neck gaiter, liner gloves, insulated mittens, UV-protective sunglasses. Sleep system: four-season sleeping bag, sleeping bag liner. Other essentials: trekking poles, daypack with rain cover, duffel bag with rain cover, headlamp with spare batteries, power bank, universal adapter, water bottle or bladder with purification method, personal first aid kit, sunscreen, lip balm with SPF, hand sanitizer, and all necessary travel documents and cash.
Packing List Differences by Season
Spring, from March to May, and autumn, from late September to November, are the main trekking seasons and generally allow for a slightly lighter packing list than winter, though nights above Dingboche remain cold in either season and full cold-weather gear is still necessary. Winter trekkers, from December to February, need a heavier-rated sleeping bag and down jacket, since overnight temperatures at higher elevations regularly drop well below what spring and autumn trekkers experience.
Monsoon season trekkers, from June to August, need a lighter overall clothing weight but should prioritize waterproofing, since consistent rain at lower elevations is the defining challenge of that season rather than extreme cold. We tailor our specific packing guidance to your booked travel dates, since the right gear list genuinely does shift meaningfully between seasons on this route.
How Much Should Your Total Pack Weigh
Between your daypack and the duffel bag carried by a porter, most trekkers travel with a combined total of around fifteen to eighteen kilograms of gear, split roughly between a light daypack of five to seven kilograms and a duffel within the twelve to fifteen kilogram porter limit. Staying within these limits is not just about comfort, it directly affects your porter’s workload and, at altitude, their own safety and pace.
If you find your gear consistently exceeding these limits during a practice pack at home, it is worth reviewing the list again for genuine essentials versus items brought out of habit rather than real need. Our team is glad to review a draft packing list with any client who wants a second opinion before departure.
Buying Gear in Kathmandu Versus Bringing It From Home
Thamel’s trekking shops sell everything from budget-friendly gear to genuine branded equipment, and many trekkers choose to buy items like down jackets, gloves, or trekking poles there rather than pack them from home, particularly if travelling from a warm climate where suitable cold-weather gear is not already owned. Quality varies significantly between shops, with counterfeit branded gear common at the lower end of the price range, so buying from a well-established shop is worth the modest extra cost for critical items like your sleeping bag or down jacket.
Items that fit and perform reliably, such as boots, are better brought from home and broken in well in advance, since finding a properly fitting pair in Kathmandu on short notice, and having time to break them in before the trek starts, is far less reliable than sorting this out weeks ahead of travel.
Final Packing Advice
Do a full practice pack at home at least two weeks before departure, wearing your boots and full layering system on a training hike to confirm everything fits, functions, and feels comfortable under real walking conditions rather than discovering a problem for the first time on the trail. Weigh your duffel bag before departure to confirm it falls within porter weight limits, and keep a printed copy of this packing list with you to check off items as you go.
If you have specific questions about any item on this list, or want us to review your own draft packing list before you fly, reach out to our team well ahead of your departure date. Getting this part right removes one of the biggest sources of pre-trip stress and lets you focus on the training and acclimatization planning that matter most once you are actually on the trail.
We update this list each season based on direct feedback from clients who have just completed the trek, so it reflects real, current conditions on the ground rather than generic advice copied from elsewhere, and we are always happy to answer specific gear questions as part of your trip preparation.
Packing well for the Everest Base Camp trek is ultimately about preparing for a wide range of conditions in a place with very limited resupply options, from the humid lower forests around Phakding to the frigid, thin air near Kala Patthar. A thoughtful, well-tested layering system, broken-in boots, and a handful of key accessories cover the overwhelming majority of situations you will encounter on the trail.
Treat this checklist as a starting point rather than a rigid rulebook, and adjust it slightly based on your own cold tolerance, the specific season you are trekking in, and any personal medical needs. The goal is arriving on the trail properly equipped, not simply carrying the heaviest or most expensive gear available.
If you are booking your trek with us, our pre-departure documentation includes a detailed gear checklist tailored to your exact travel dates and itinerary, along with recommendations on what to buy at home versus what to rent or buy in Kathmandu, so you arrive fully prepared without overpacking or underpacking for the conditions ahead.
Reach out any time before your trip and we will help make sure your gear list matches your exact itinerary, season, and personal needs.
Good preparation on this one point pays off every single day of the trek, from the first warm walk out of Lukla to the coldest morning near Kala Patthar.
Related EBC Trek Guides
Planning Your Everest Trek?
Get local expert advice on cost, itinerary and the best time to go.